How to Keep Characters Consistent in NSFW AI Videos
Your AI characters keep changing faces. Here's why — and exactly how to fix it.
The Real Problem: Your Characters Won't Stay the Same
If you've spent any time generating NSFW AI video content, you've almost certainly experienced this: you create a character you love — the perfect face, the right body type, the exact look you want. Then you try to make a second video with the same character, and she looks like a completely different person. Or worse, her face starts drifting mid-video, morphing into someone else frame by frame.
You're not alone. This is the single most common complaint across every NSFW AI video community — from Reddit threads to Discord servers to Civitai forums. The problem isn't that AI can't generate attractive content. It absolutely can. The problem is that AI can't remember who your character is.
Face Drift Across Poses
Change the angle, expression, or pose, and the AI effectively creates a new person. The nose gets wider, the eyes shift shape, the jawline changes. It's subtle enough to feel uncanny and obvious enough to break immersion.
Details Vanish First
Tattoos, birthmarks, piercings, specific hairstyles, and distinctive accessories are the first casualties. The AI treats them as optional decorations rather than core identity features. A character with a sleeve tattoo in frame one might have clean arms by frame three.
Longer Videos = More Drift
The first 2-3 seconds usually look fine. But every additional frame introduces tiny errors that compound. By 10 seconds, you're often looking at a relative of your original character — not the character herself.
Prompts Alone Can't Fix This
No matter how detailed your text prompt is — "green eyes, heart-shaped face, 34C, small nose, shoulder-length auburn hair" — the AI interprets it fresh every time. Text descriptions are inherently ambiguous. Two generations from the same prompt will produce two different people.
Why AI Can't Remember Your Character
Before jumping into solutions, it helps to understand why this happens. It's not a bug — it's a fundamental limitation of how current AI video models work.
AI Has No Character Memory
When you generate a new NSFW AI video, the model starts from scratch. It has no concept of "this is the same woman from last time." Each generation is an independent event. The model doesn't store a reference to your previous outputs — it simply follows whatever instructions you give it right now.
Text Prompts Are Ambiguous
Describing a face in words is like giving someone directions without a map. "Blue eyes" could mean a thousand different shades and shapes. The AI fills in the gaps differently every time, which is why the same prompt produces different faces.
Reference Images Are Often Ignored
Some platforms and models accept reference images, but the results are inconsistent. Community testing shows that reference images are sometimes partially ignored, or only loosely followed — especially when the pose or angle changes significantly from the reference.
Cumulative Error in Video
In video generation, each frame builds on the previous one. Small deviations accumulate over time — like photocopying a photocopy. By the 100th frame, the "copy" looks noticeably different from the original. This is why NSFW AI video character consistency degrades with longer clips.
The Three Layers of Character Consistency
Character consistency in NSFW AI video isn't one thing — it's three things stacked on top of each other:
Visual Identity
The basics: same face, body type, skin tone, hair color, and distinguishing features across frames.
Editable Consistency
Can you change the pose, outfit, or camera angle while keeping it recognizably the same person? This is harder than it sounds.
Cross-Modal Consistency
Does the character look the same across different output types — still images, short clips, longer videos? Most tools fail here.
Before We Start: The Tool You'll Need
Most of the solutions below rely on a free, open-source tool called ComfyUI. If you haven't heard of it, here's what you need to know:
ComfyUI is a visual AI workflow builder. Instead of writing code, you drag and drop different AI modules — like building blocks — and connect them together. For example, you can chain "load image" → "lock face identity" → "generate video" into a single pipeline.
Free & Open Source
No subscription fees, no content restrictions. You own the entire workflow.
Runs Locally
Everything processes on your own computer. Your NSFW AI video content never touches a server. Complete privacy.
Infinitely Flexible
Every tool mentioned in this guide — InstantID, LoRA, VACE, ReActor — exists as a ComfyUI node that you can freely combine.
You'll need a computer with an NVIDIA GPU (8GB VRAM minimum, 12GB+ recommended). No GPU? Cloud services like RunPod and ThinkDiffusion let you rent one by the hour.
How to Install ComfyUI on Your Computer
There are three ways to install ComfyUI. Pick whichever feels comfortable:
Option A: Desktop App (Recommended for Beginners)
The easiest way. Go to comfy.org, click Download, and install it like any normal app. It works on Windows and macOS. The installer handles Python, PyTorch, and CUDA automatically — you don't need to touch a terminal. Once installed, just open the app and it launches ComfyUI in your browser at http://127.0.0.1:8188.
Option B: Portable Version (Windows Only)
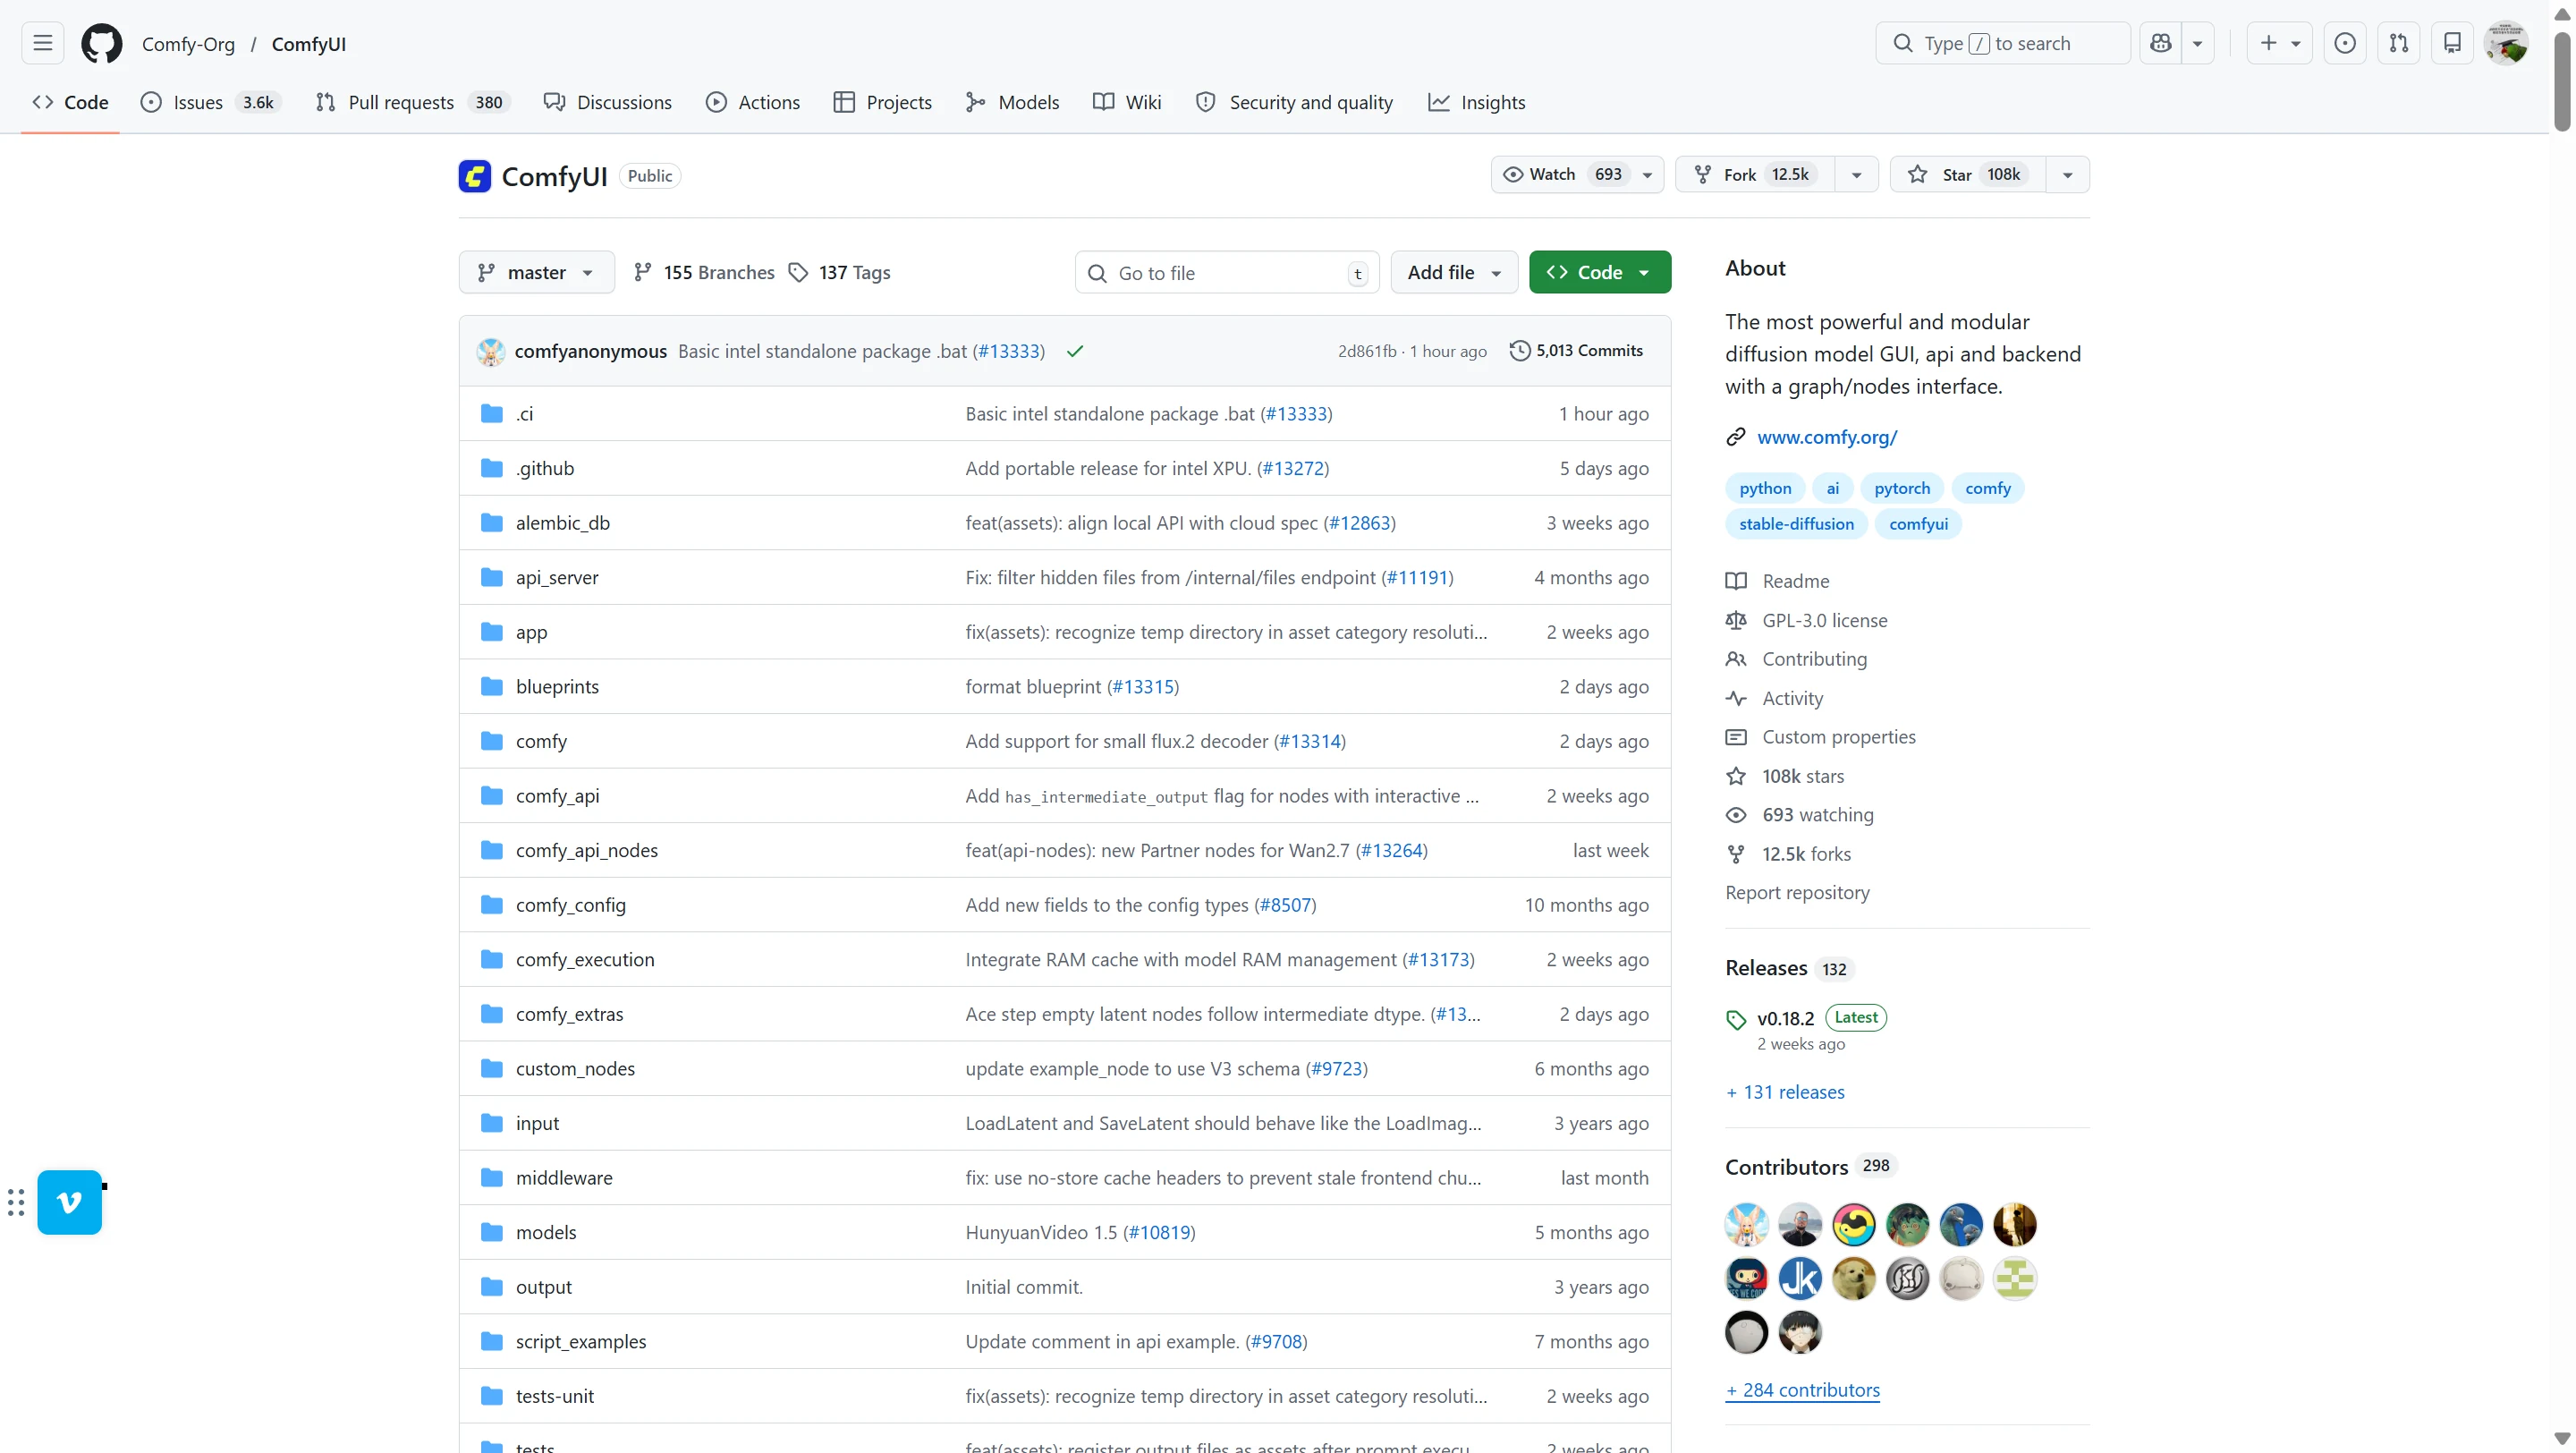
Download the portable .zip from the ComfyUI GitHub releases page. Unzip it anywhere, and run the included .bat file. No installation required — it runs self-contained with its own Python. Good if you don't want to install anything system-wide.
Option C: Manual Install (Advanced Users)
Clone the repo from GitHub, install Python 3.13, install PyTorch with CUDA support, then run python main.py. This gives you the most control but requires familiarity with the command line. Only choose this if you know what you're doing.
Hardware Requirements — Be Honest With Your GPU
ComfyUI runs AI models on your graphics card (GPU). The more VRAM your GPU has, the bigger and better models you can run. Here's what you need:
Minimum (8GB VRAM)
GPUs like RTX 3060, RTX 4060. You can generate images and short videos, but you'll need to use compressed (GGUF) versions of larger models. Works, but tight.
Recommended (12-16GB VRAM)
GPUs like RTX 3060 Ti (12GB), RTX 4070. Comfortable for most workflows in this guide. You can run InstantID, PuLID, LoRA training, and standard video models without constant VRAM errors.
Ideal (24GB+ VRAM)
GPUs like RTX 3090, RTX 4090. Run the full Wan 2.2 14B model at 720p, train LoRAs faster, and generate longer video clips. The luxury tier.
No NVIDIA GPU at all? You can run ComfyUI on AMD GPUs (experimental support) or Apple Silicon Macs (M1/M2/M3/M4 via Metal), but NVIDIA gives the best compatibility and speed. Or skip local hardware entirely with cloud options below.
No GPU? Use ComfyUI in the Cloud
If your computer can't run ComfyUI locally — or you don't want to deal with hardware — several services let you run ComfyUI on rented cloud GPUs. You pay by the hour and get a full ComfyUI environment in your browser, no setup required.
Comfy Cloud (Official)
Made by the ComfyUI team themselves. Runs on powerful RTX 6000 Pro GPUs (96GB VRAM). Free tier: 400 credits/month (~35 short videos). Paid plans: $20/month (Standard), $35/month (Creator — lets you upload custom LoRAs), $100/month (Pro). Best for: people who want the simplest possible setup with official support.
RunComfy
Pay-as-you-go cloud GPUs. Prices: $0.99/hr for 16GB VRAM (basic image generation), $1.75/hr for 24GB VRAM (video generation), $2.50/hr for 48GB VRAM (large models). Optional Pro plan at $19.99/month for 20% discount on all rates. 400+ preloaded models and nodes. Best for: power users who want to choose their GPU tier.

ThinkDiffusion
Similar pricing to RunComfy: $0.99/hr (16GB), $1.75/hr (24GB), $2.50/hr (48GB). TD-Pro at $19.99/month for discounts and 200GB persistent storage. Many popular extensions (including ReActor) are preloaded. Best for: users who want extensions pre-installed with zero configuration.
Installing Custom Nodes (Extensions)
ComfyUI by itself only includes basic nodes. To use InstantID, PuLID, LoRA loaders, ReActor, and everything else in this guide, you install "custom nodes" (also called extensions) — community-made plugins that add new capabilities.
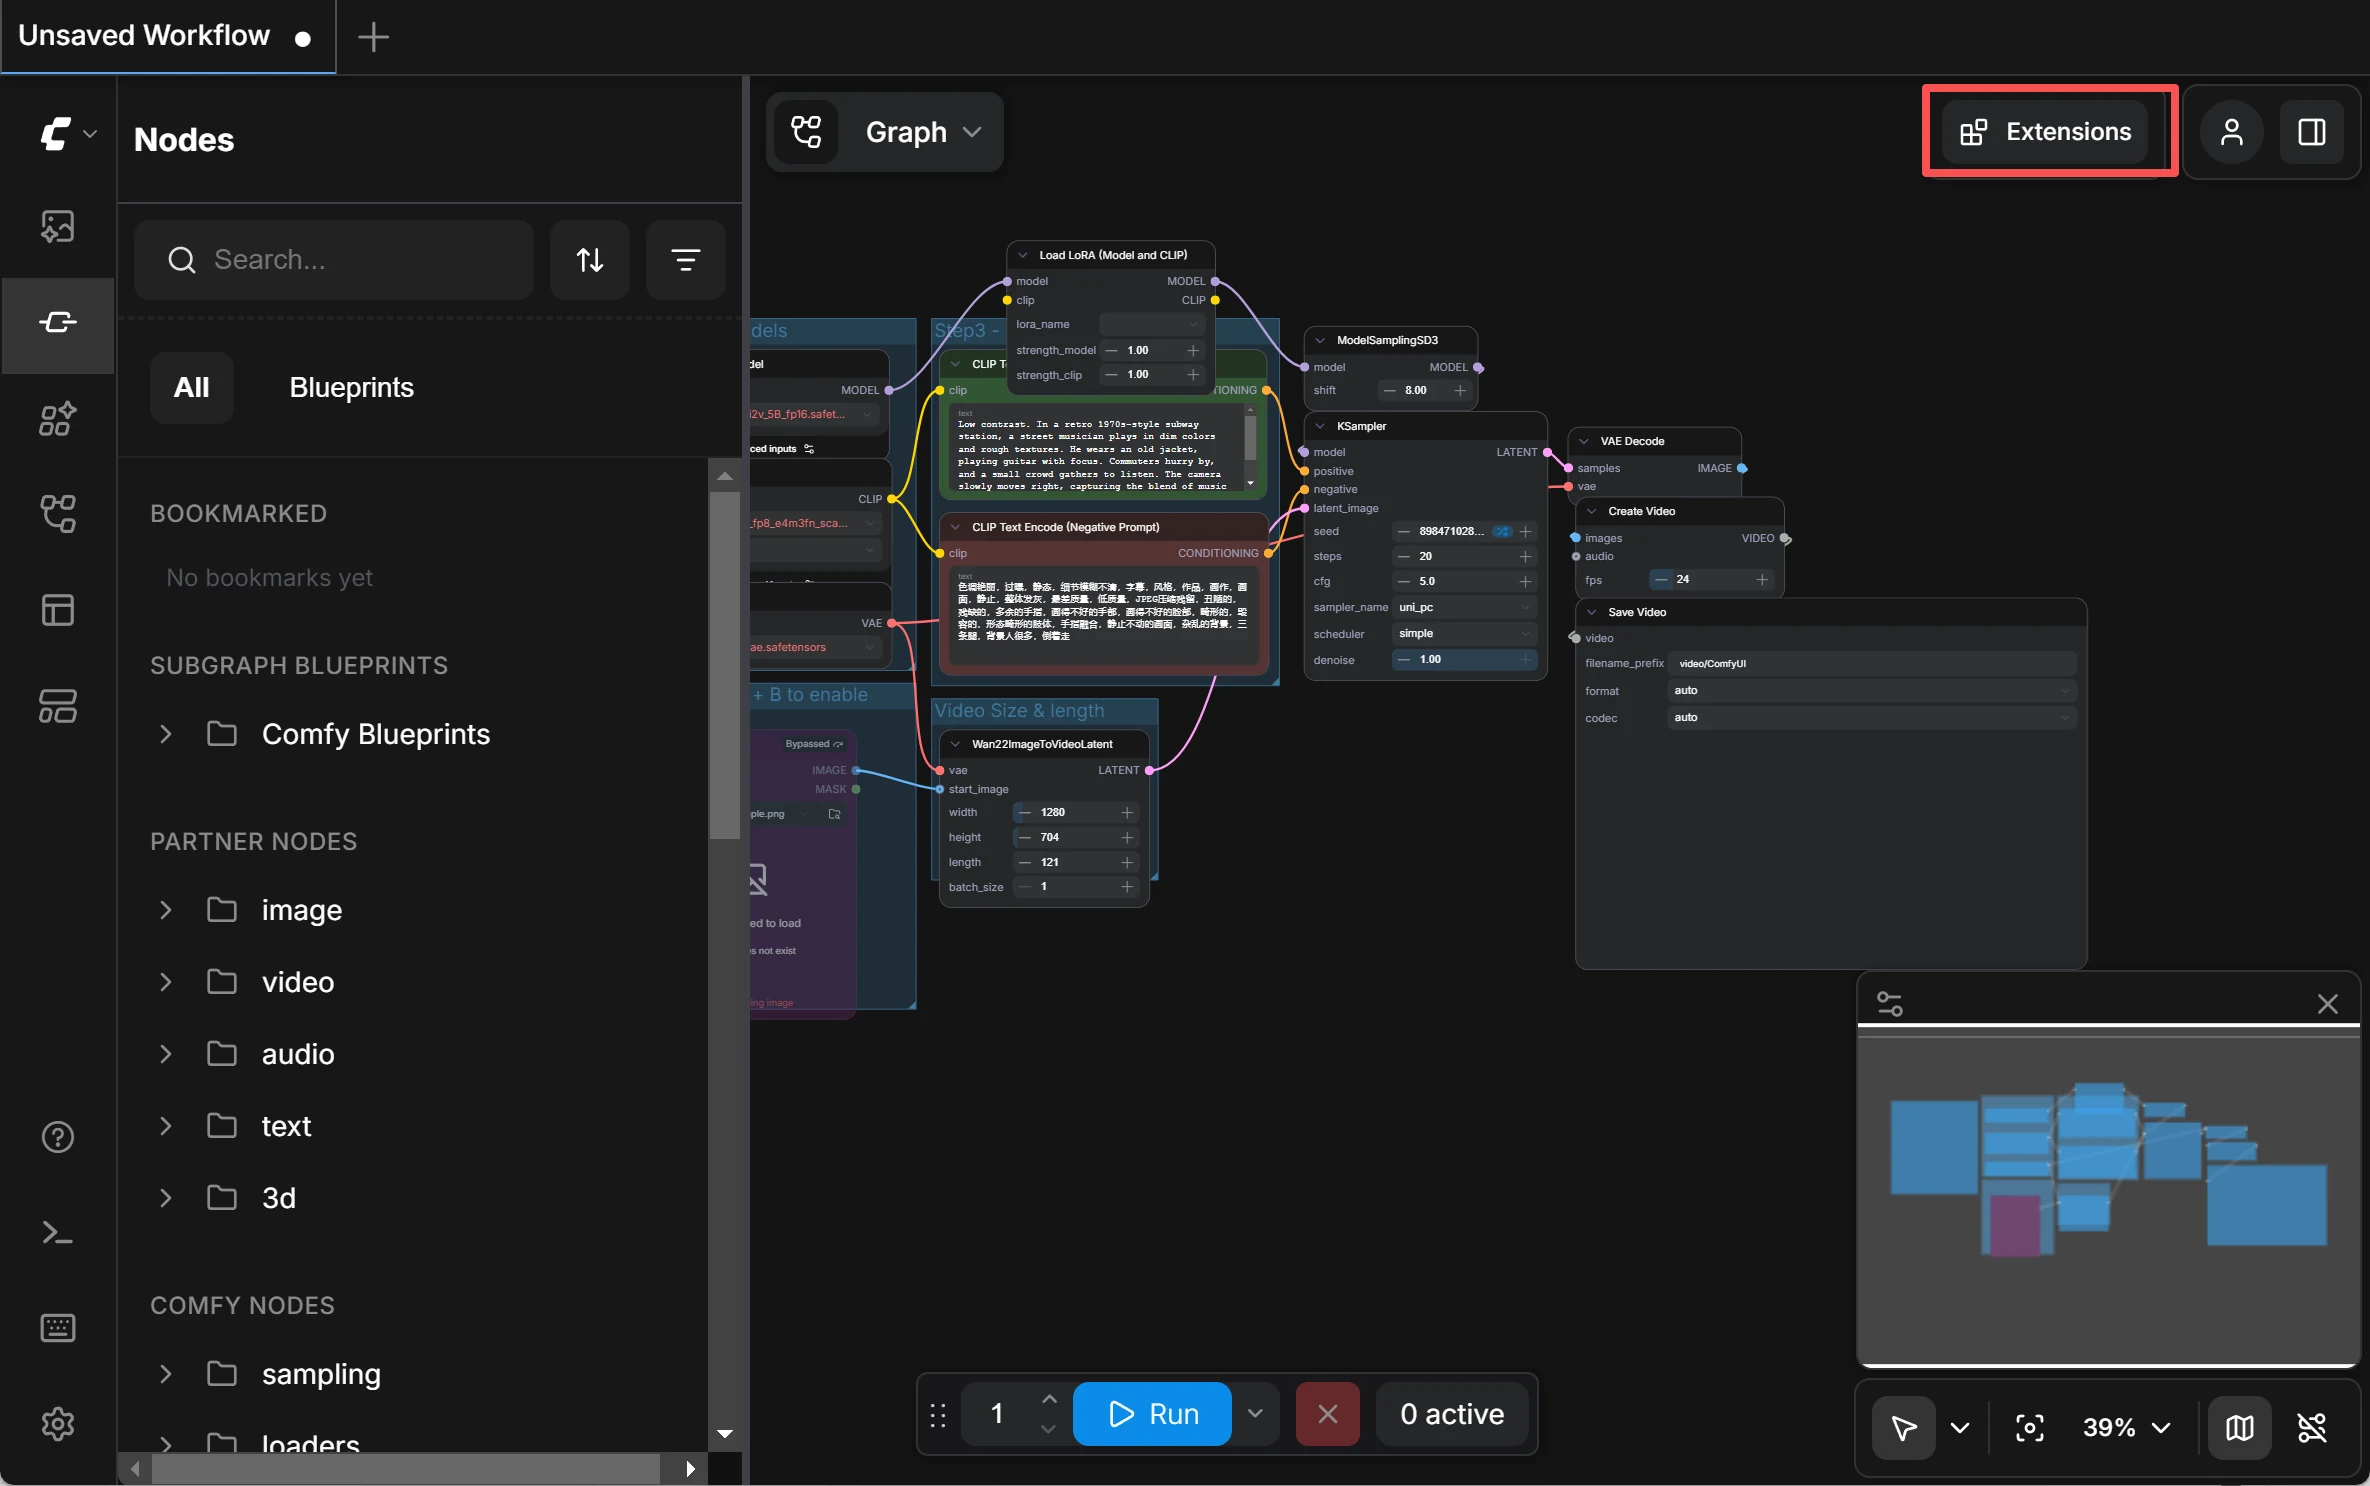
ComfyUI V1 / Desktop App (Recommended)
Good news: if you're using ComfyUI V1 (the Desktop app or a recent portable build), the extension manager is already built in — you don't need to install anything extra. Simply click the Plugin / Extensions icon in the top-right corner of the interface (or go to Menu → Help → Extension Management). From there you can search for any node by name — for example, type "InstantID" or "PuLID" — click Install, and restart ComfyUI. That's it.
Older Versions (Legacy Method)
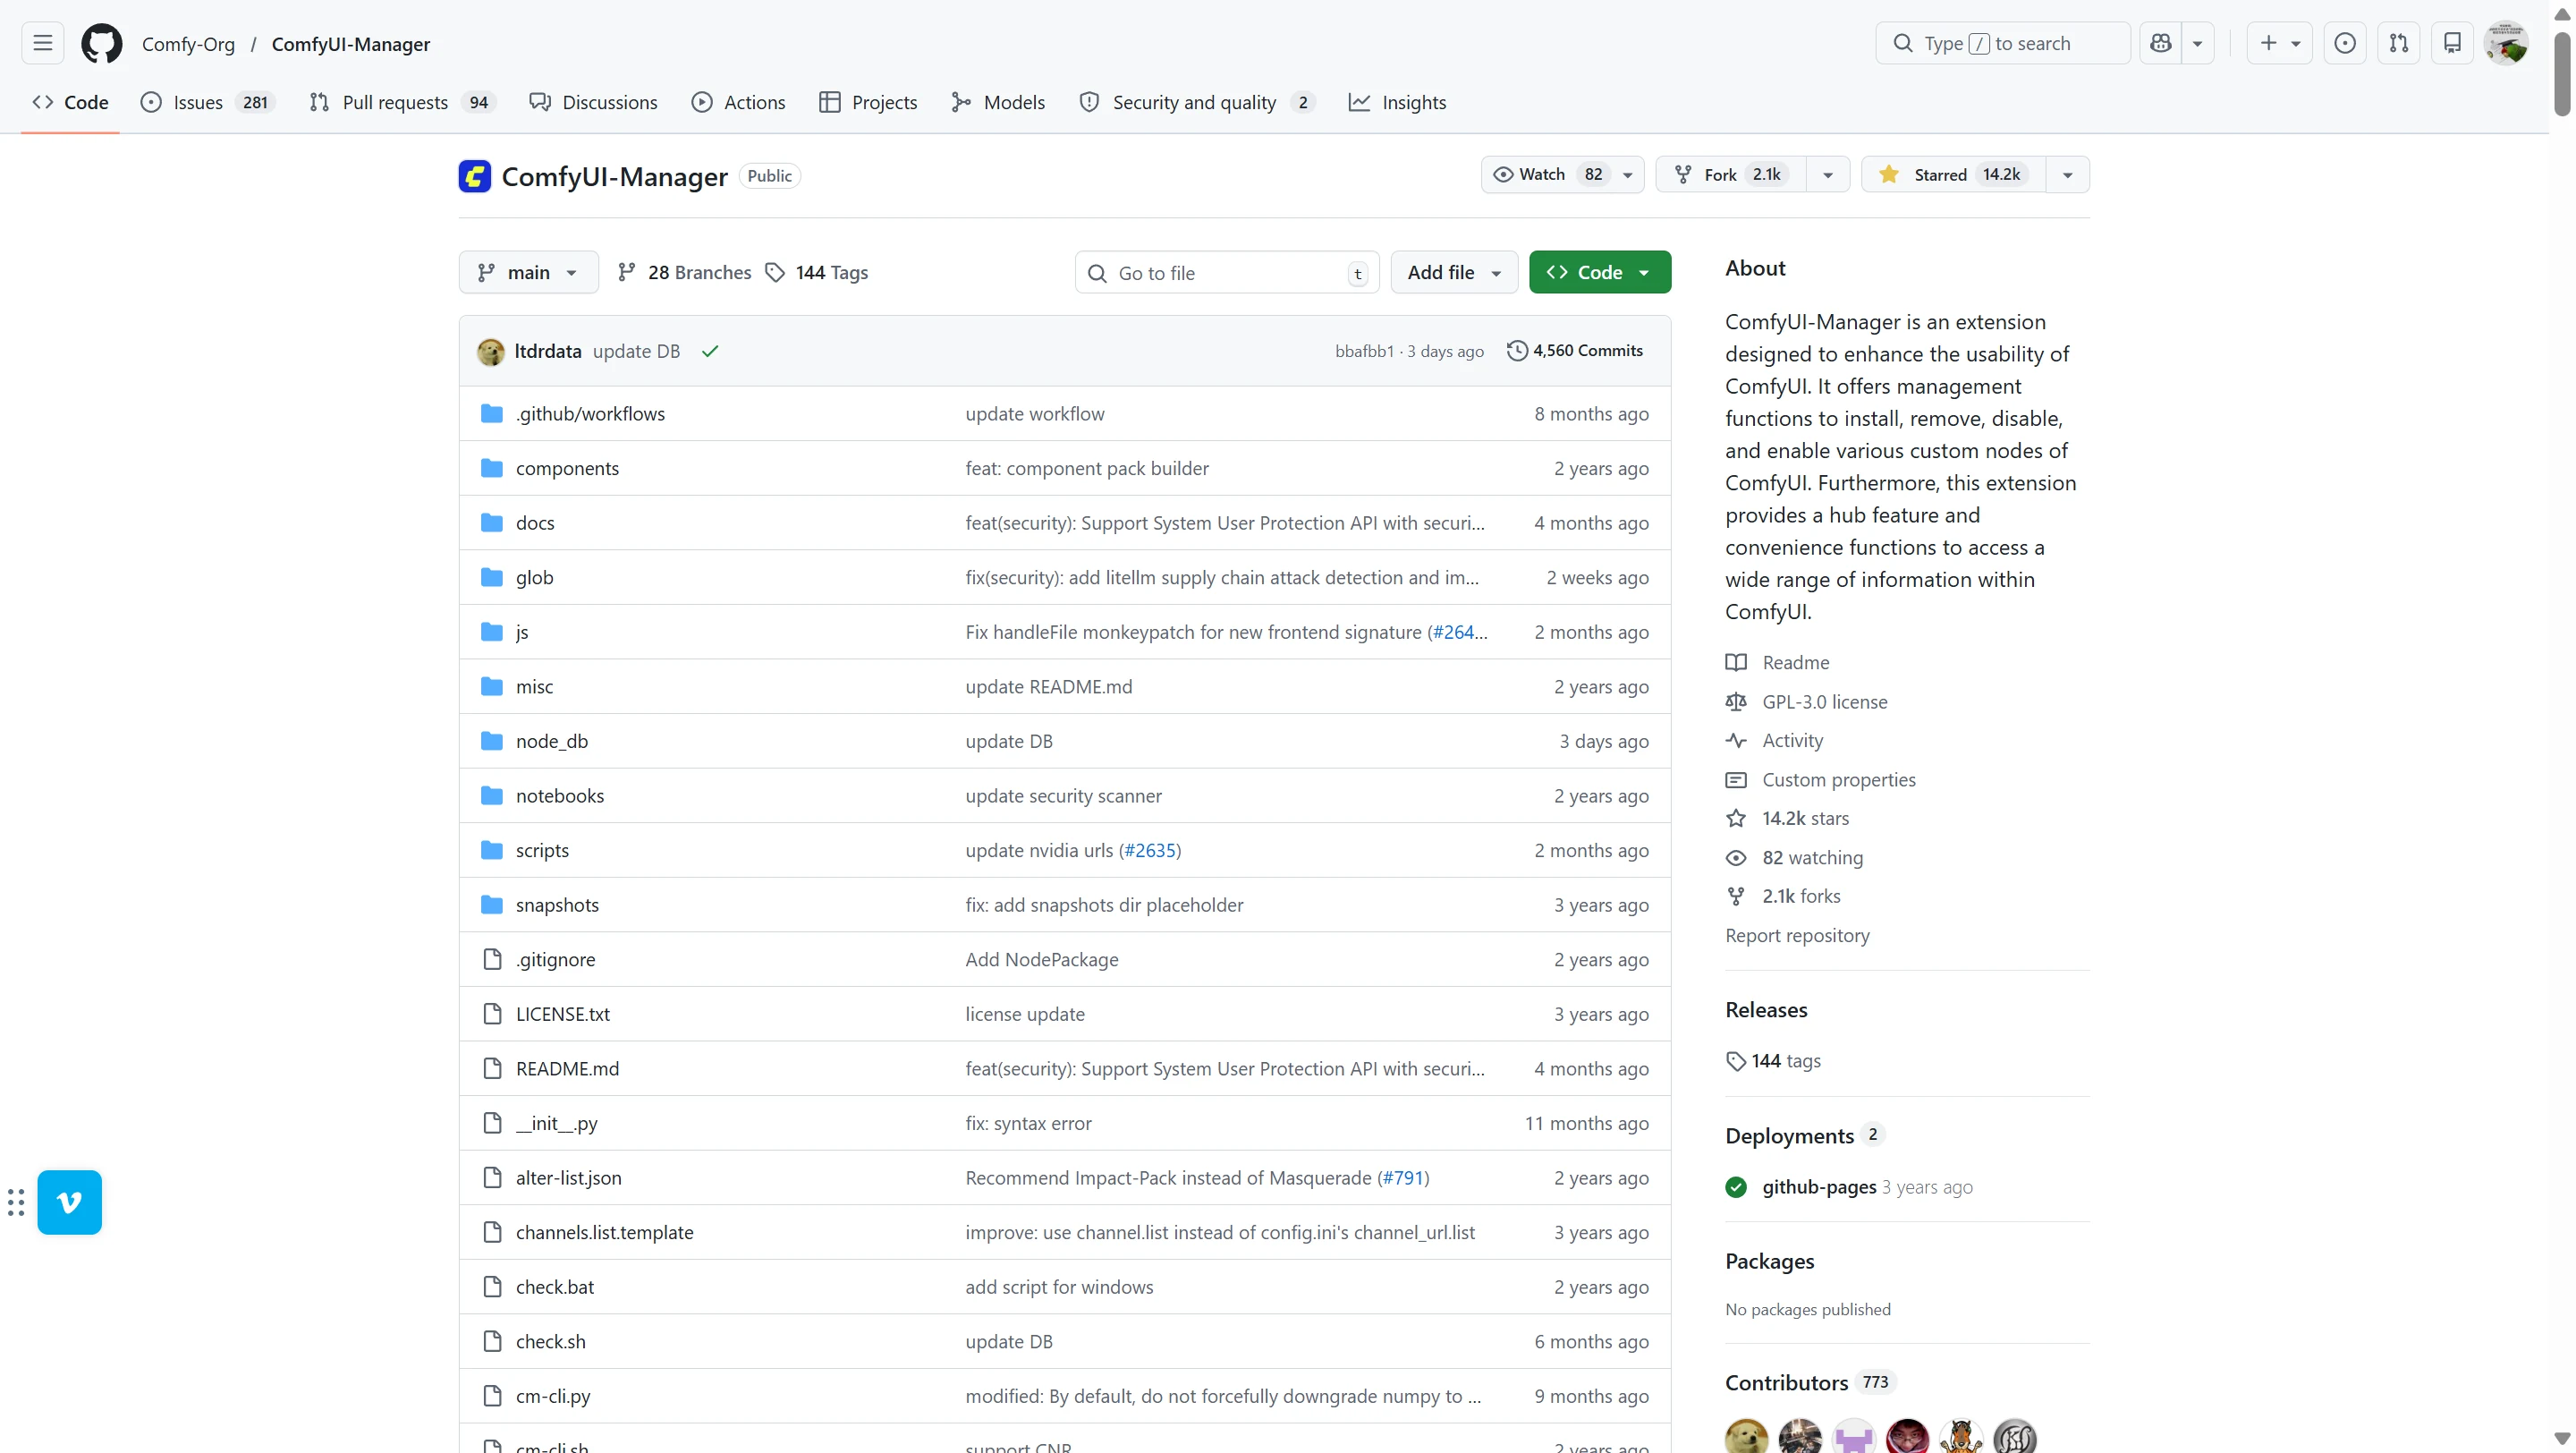
If you're running an older ComfyUI build that doesn't have the built-in manager, you can install it manually: download ComfyUI-Manager from GitHub and place the folder in your ComfyUI/custom_nodes/ directory. Restart ComfyUI, and you'll see a "Manager" button in the menu bar. Click it → "Custom Nodes Manager" → search and install nodes the same way.
Cloud users: If you're using RunComfy or ThinkDiffusion, many popular nodes (including ReActor) are already preloaded. You can still install additional ones through the built-in extension manager the same way.
5 Proven Methods to Fix Character Consistency
These solutions are ordered from simplest to most involved. You don't need all five — pick the ones that match your skill level and goals.
Method 1: Zero-Shot ID Lock
Easiest — No Training RequiredWhat Are ID Lock Tools?
Tools like InstantID, PuLID, and PhotoMaker are plugins for AI image models. You feed them a single face photo, and they extract the key facial features — the distance between the eyes, the shape of the jaw, the nose bridge angle. Then, when generating new images, they use these features as an anchor to keep the face consistent.
The term "zero-shot" means you don't need to train anything. Upload one photo, and the tool works immediately. No waiting, no GPU hours, no dataset preparation.
How They Compare
How to Use It (Step-by-Step in ComfyUI)
Step 1: Install the Node
- Open ComfyUI. If you're using ComfyUI V1 / Desktop, click the Plugin / Extensions icon in the top-right corner (or go to Menu → Help → Extension Management). On older versions, click the Manager button in the menu bar → Custom Nodes Manager.
- In the search box, type "ComfyUI_InstantID" (for InstantID) or "PuLID_ComfyUI" (for PuLID). Click Install next to the result by "cubiq". Wait for it to finish, then click Restart.
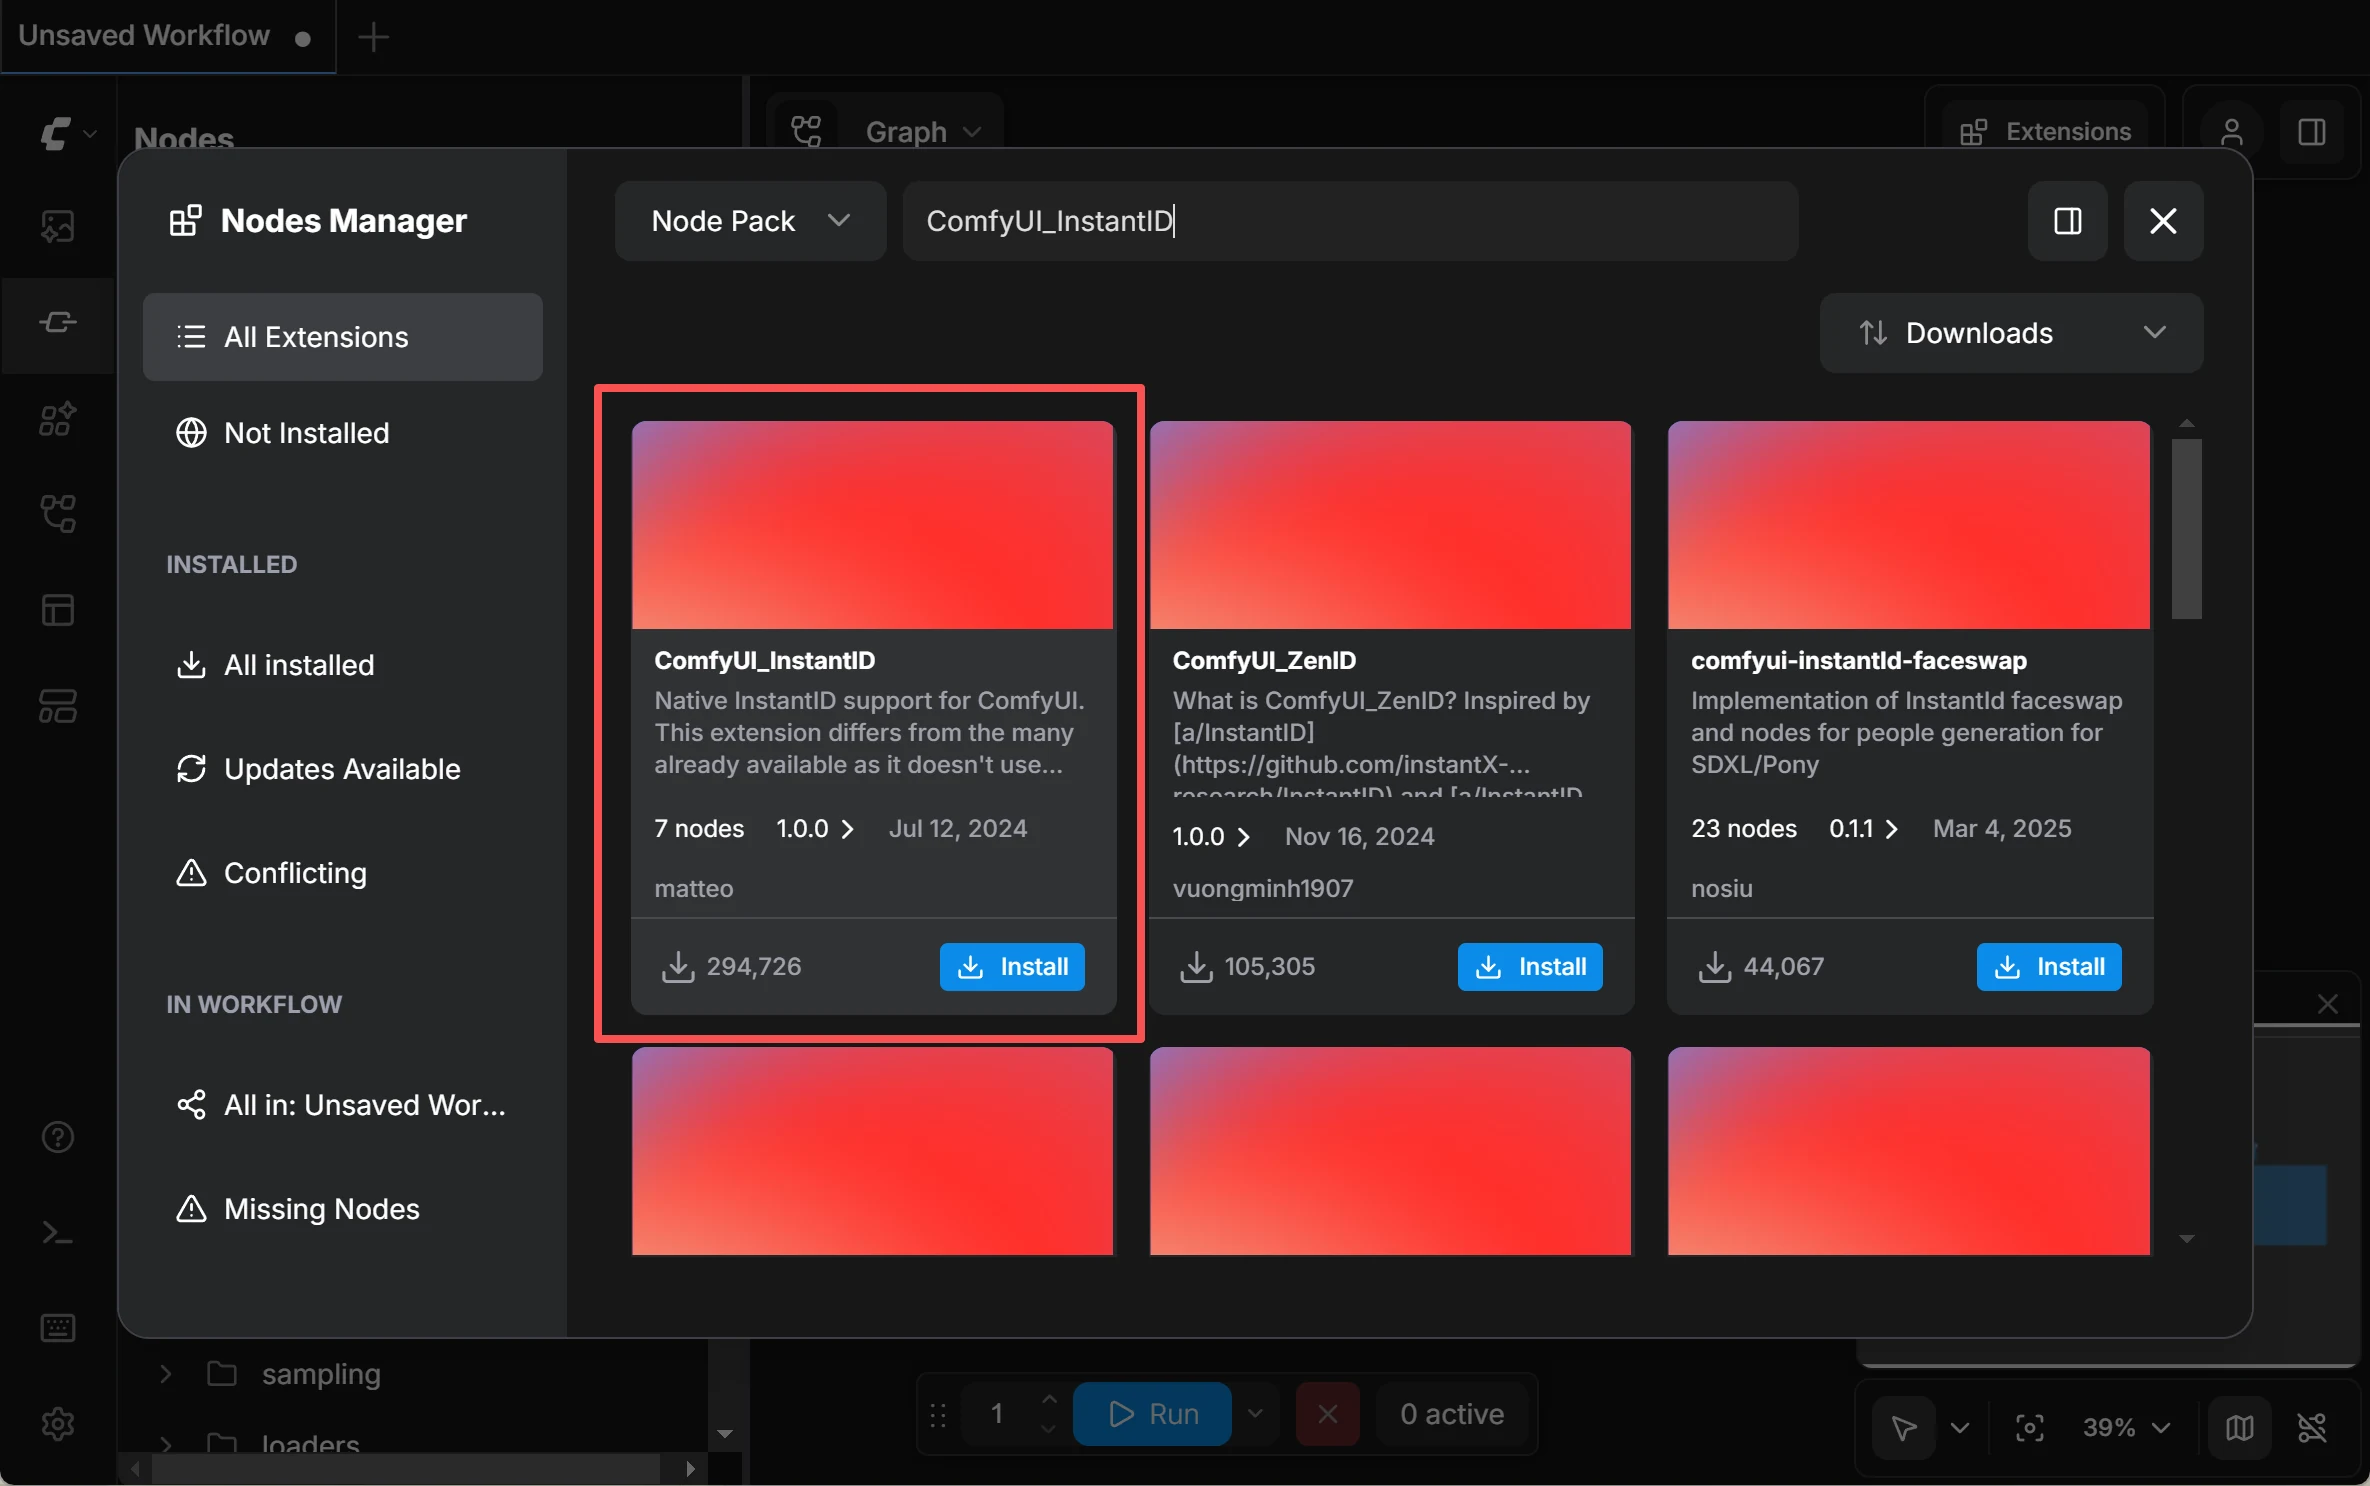
- After ComfyUI restarts, refresh your browser. The new nodes are now available.
Step 2: Download the Required Models
The nodes need several model files to work. Here's where each one goes:
Step 3: Build the Workflow
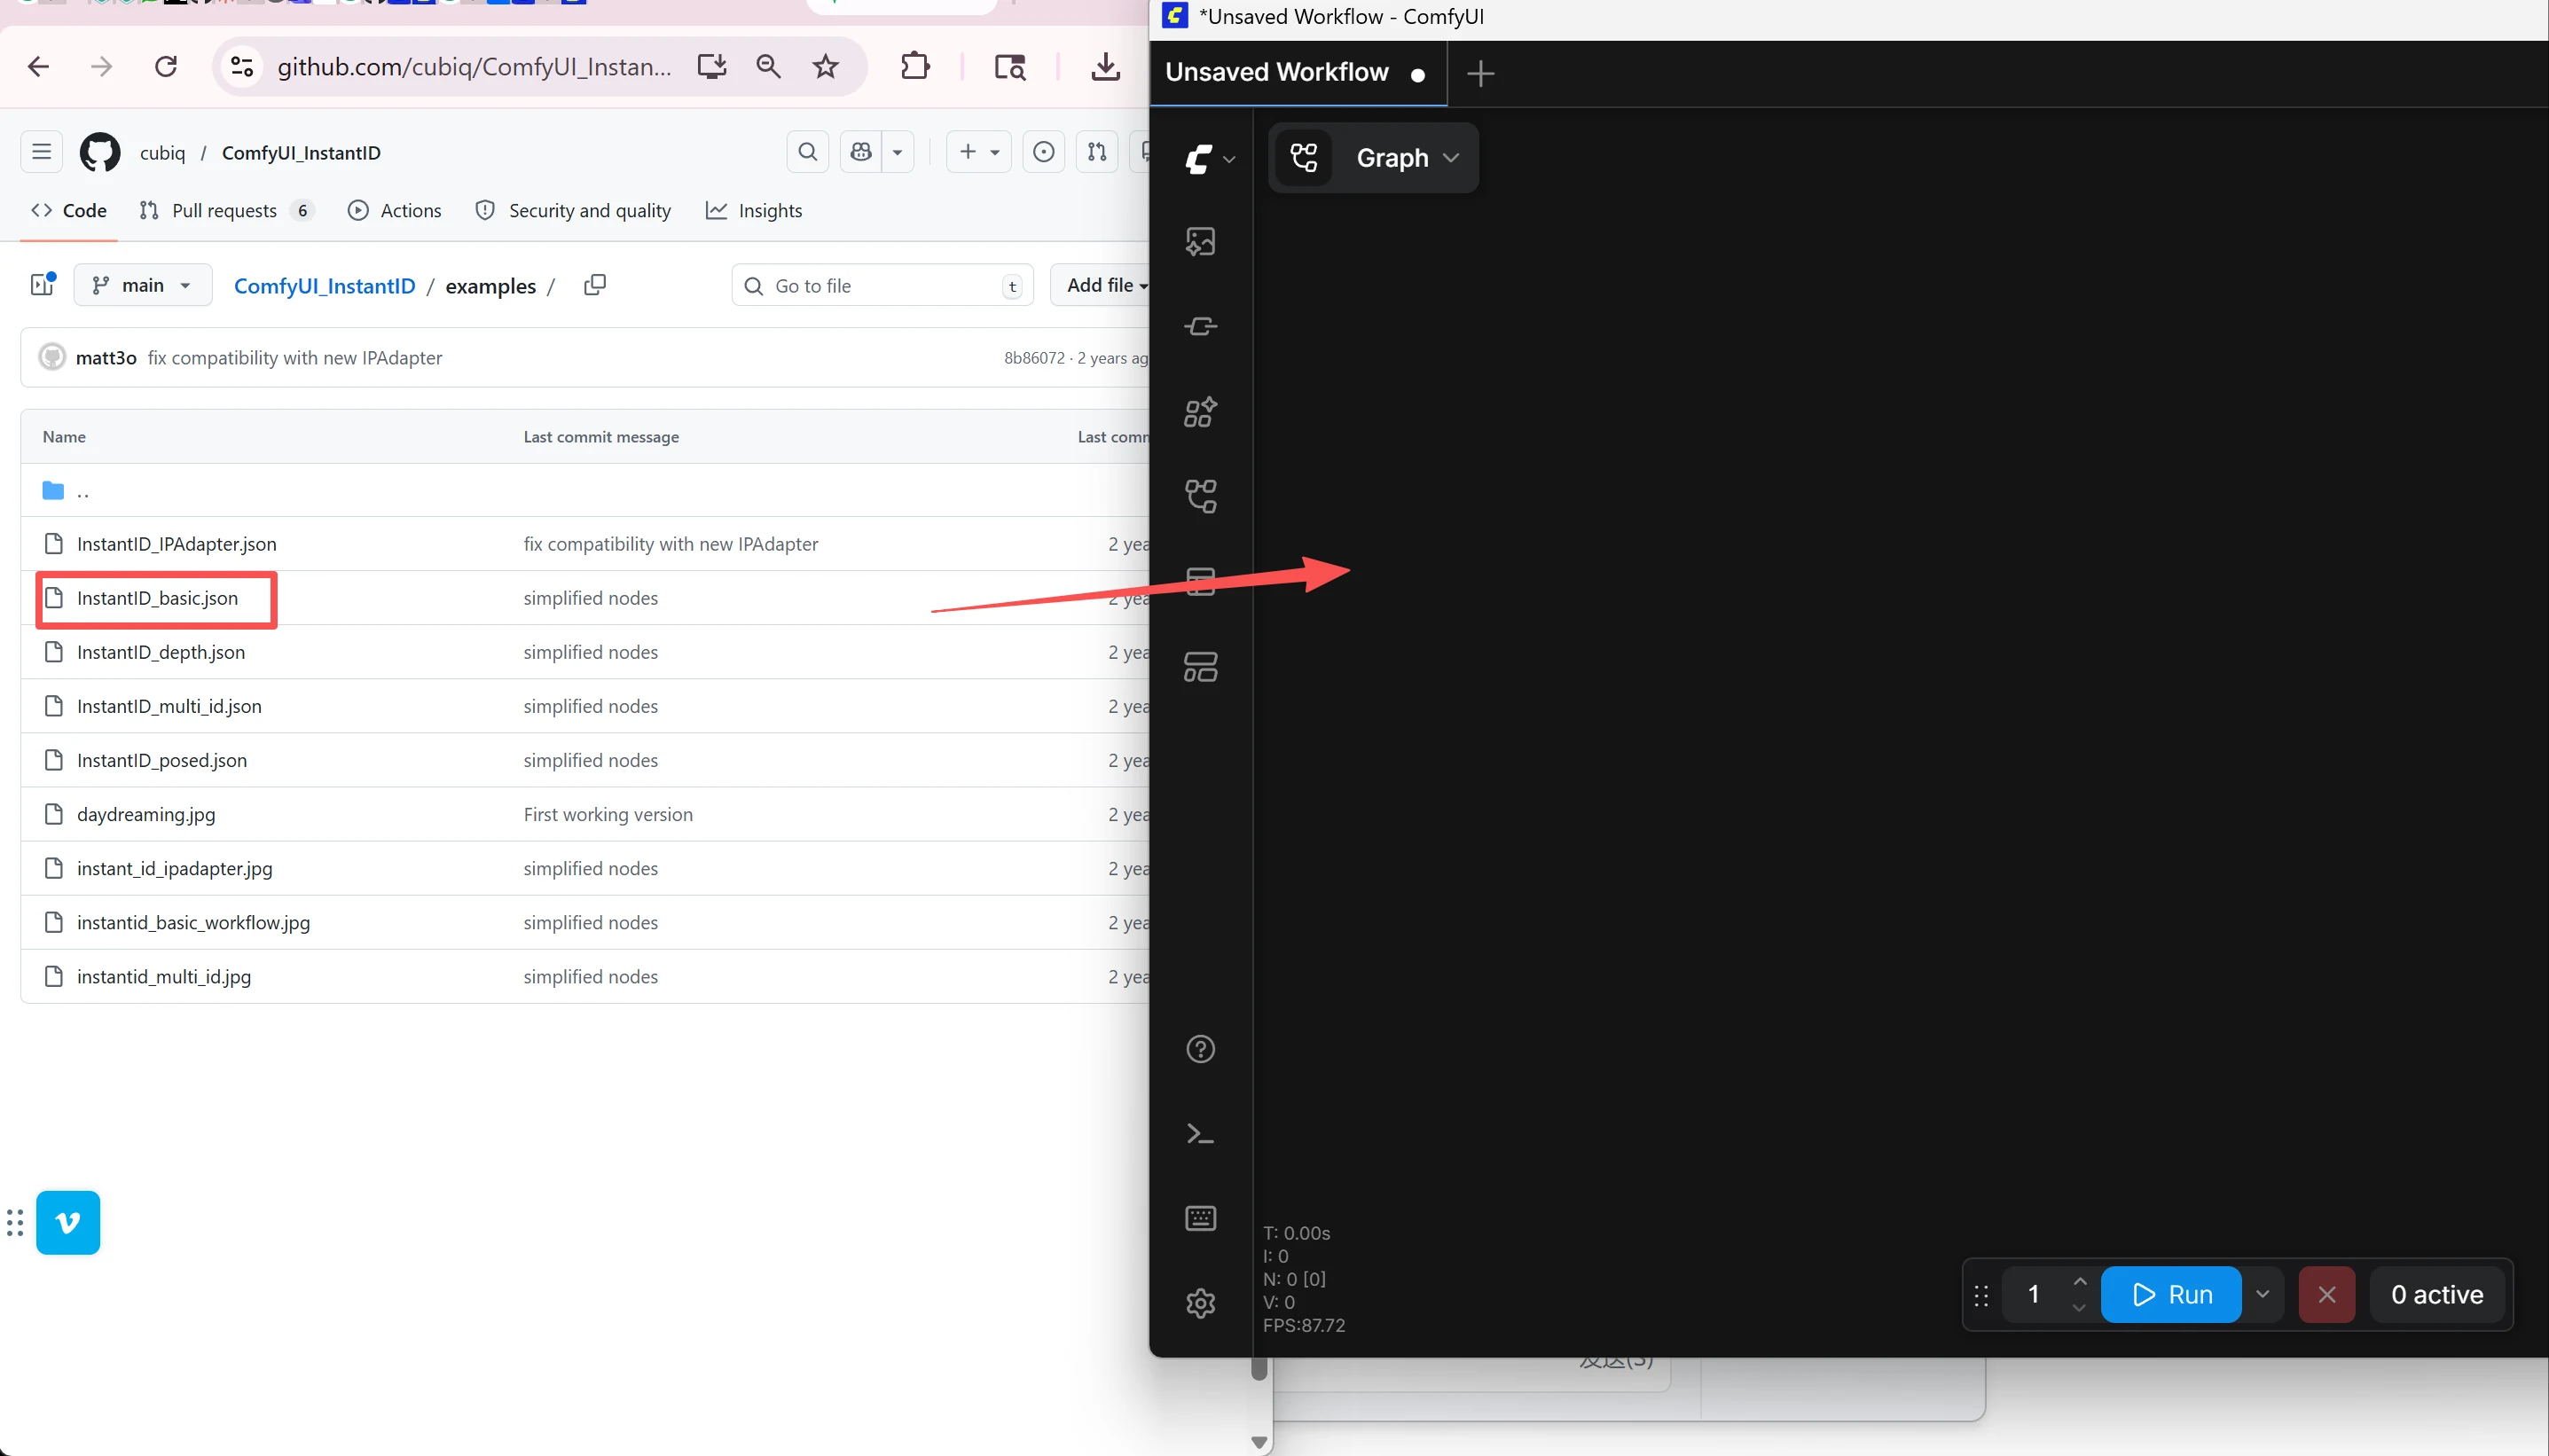
The easiest way: go to the GitHub page for InstantID or PuLID, find the examples/ folder, download a sample workflow .json file, and drag it into your ComfyUI browser window. It will load a pre-built workflow with all nodes already connected. Then just:
- Select your SDXL checkpoint in the "Load Checkpoint" node
- Load your reference face photo into the "Load Image" node
- Write your prompt in the "Positive Prompt" box — describe what you want (e.g., "beautiful woman, side profile, wearing elegant black dress, studio lighting")
- Set CFG to 4-5 (important! — InstantID works poorly at the default CFG of 7-8, images will look burned/over-contrasted)
- Use a resolution like 1016x1016 instead of 1024x1024 — this avoids watermarks from the training data
- Click Queue Prompt (or press Ctrl+Enter) to generate
Tips for Best Results
- Use a clear, well-lit, front-facing reference photo. Poor-quality references produce poor-quality identity locks.
- PuLID's "Fidelity" method gives the closest face match. "Style" gives more creative freedom but less resemblance. Start with Fidelity.
- If the face looks "burned" or over-saturated, lower the CFG value and/or the InstantID weight.
- Generate multiple images with different seeds — pick the best ones for your character sheet.
What it can do: Lock the face (features, face shape, skin tone) across multiple generated images. Excellent for creating a "character sheet" — a set of reference images showing your character from multiple angles.
What it can't do: Lock the full body. Clothing, tattoos, body proportions, hairstyle details, and accessories will still vary between generations. This is a face tool, not a full-character tool.
Method 2: Character LoRA Training
Most Reliable — Industry StandardWhat is a LoRA?
LoRA stands for Low-Rank Adaptation. In plain English: it's a small "memory file" (typically 20-80MB) that teaches an AI model to recognize a specific character.
Think of the AI model as a massive brain that knows millions of faces but doesn't know your character. A LoRA is a compact add-on that teaches this brain one specific identity — face, body type, hair, tattoos, signature features — everything that makes your character unique.
Once trained, this LoRA file becomes a reusable "character ID card." Every time you generate content, you load the LoRA and the AI knows exactly who to draw. This is why LoRA training is considered the gold standard for NSFW AI video character consistency.
What is a Character Sheet?
A character sheet is a collection of 15-20 images showing the same character from different angles, expressions, poses, and outfits — similar to the reference sheets used in professional animation. These images become the "textbook" that teaches your LoRA.
How to Do It
- Build your dataset: Use Method 1 (InstantID/PuLID) to generate 15-20 images of your character from different angles and poses. Or use instruction-based editing tools like Qwen Image Edit to create variations from a single source image.
- Curate quality: Review each image carefully. Remove any where the character looks off — wrong eye color, different nose shape, inconsistent features. Bad training data creates bad LoRAs.
- Train the LoRA: Use AI Toolkit (Ostris) or Kohya_SS. Settings: ~1,500-2,500 training steps, network dimension 16. On a 12-16GB GPU, training takes about 15-30 minutes. No local GPU? Use RunPod or similar cloud services.
- Apply it: Load your trained LoRA in ComfyUI when generating images or NSFW AI video content. Recommended weight: 0.6-1.0. Too high and you'll get artifacts; too low and the identity won't hold.
Step-by-Step: Using Your LoRA in ComfyUI
Once you've trained your character LoRA (you'll get a .safetensors file, typically 20-80MB), here's exactly how to use it in ComfyUI:
1. Add the LoRA File
Copy your trained .safetensors file into the ComfyUI/models/loras/ folder. If ComfyUI is already running, restart it so it detects the new file.
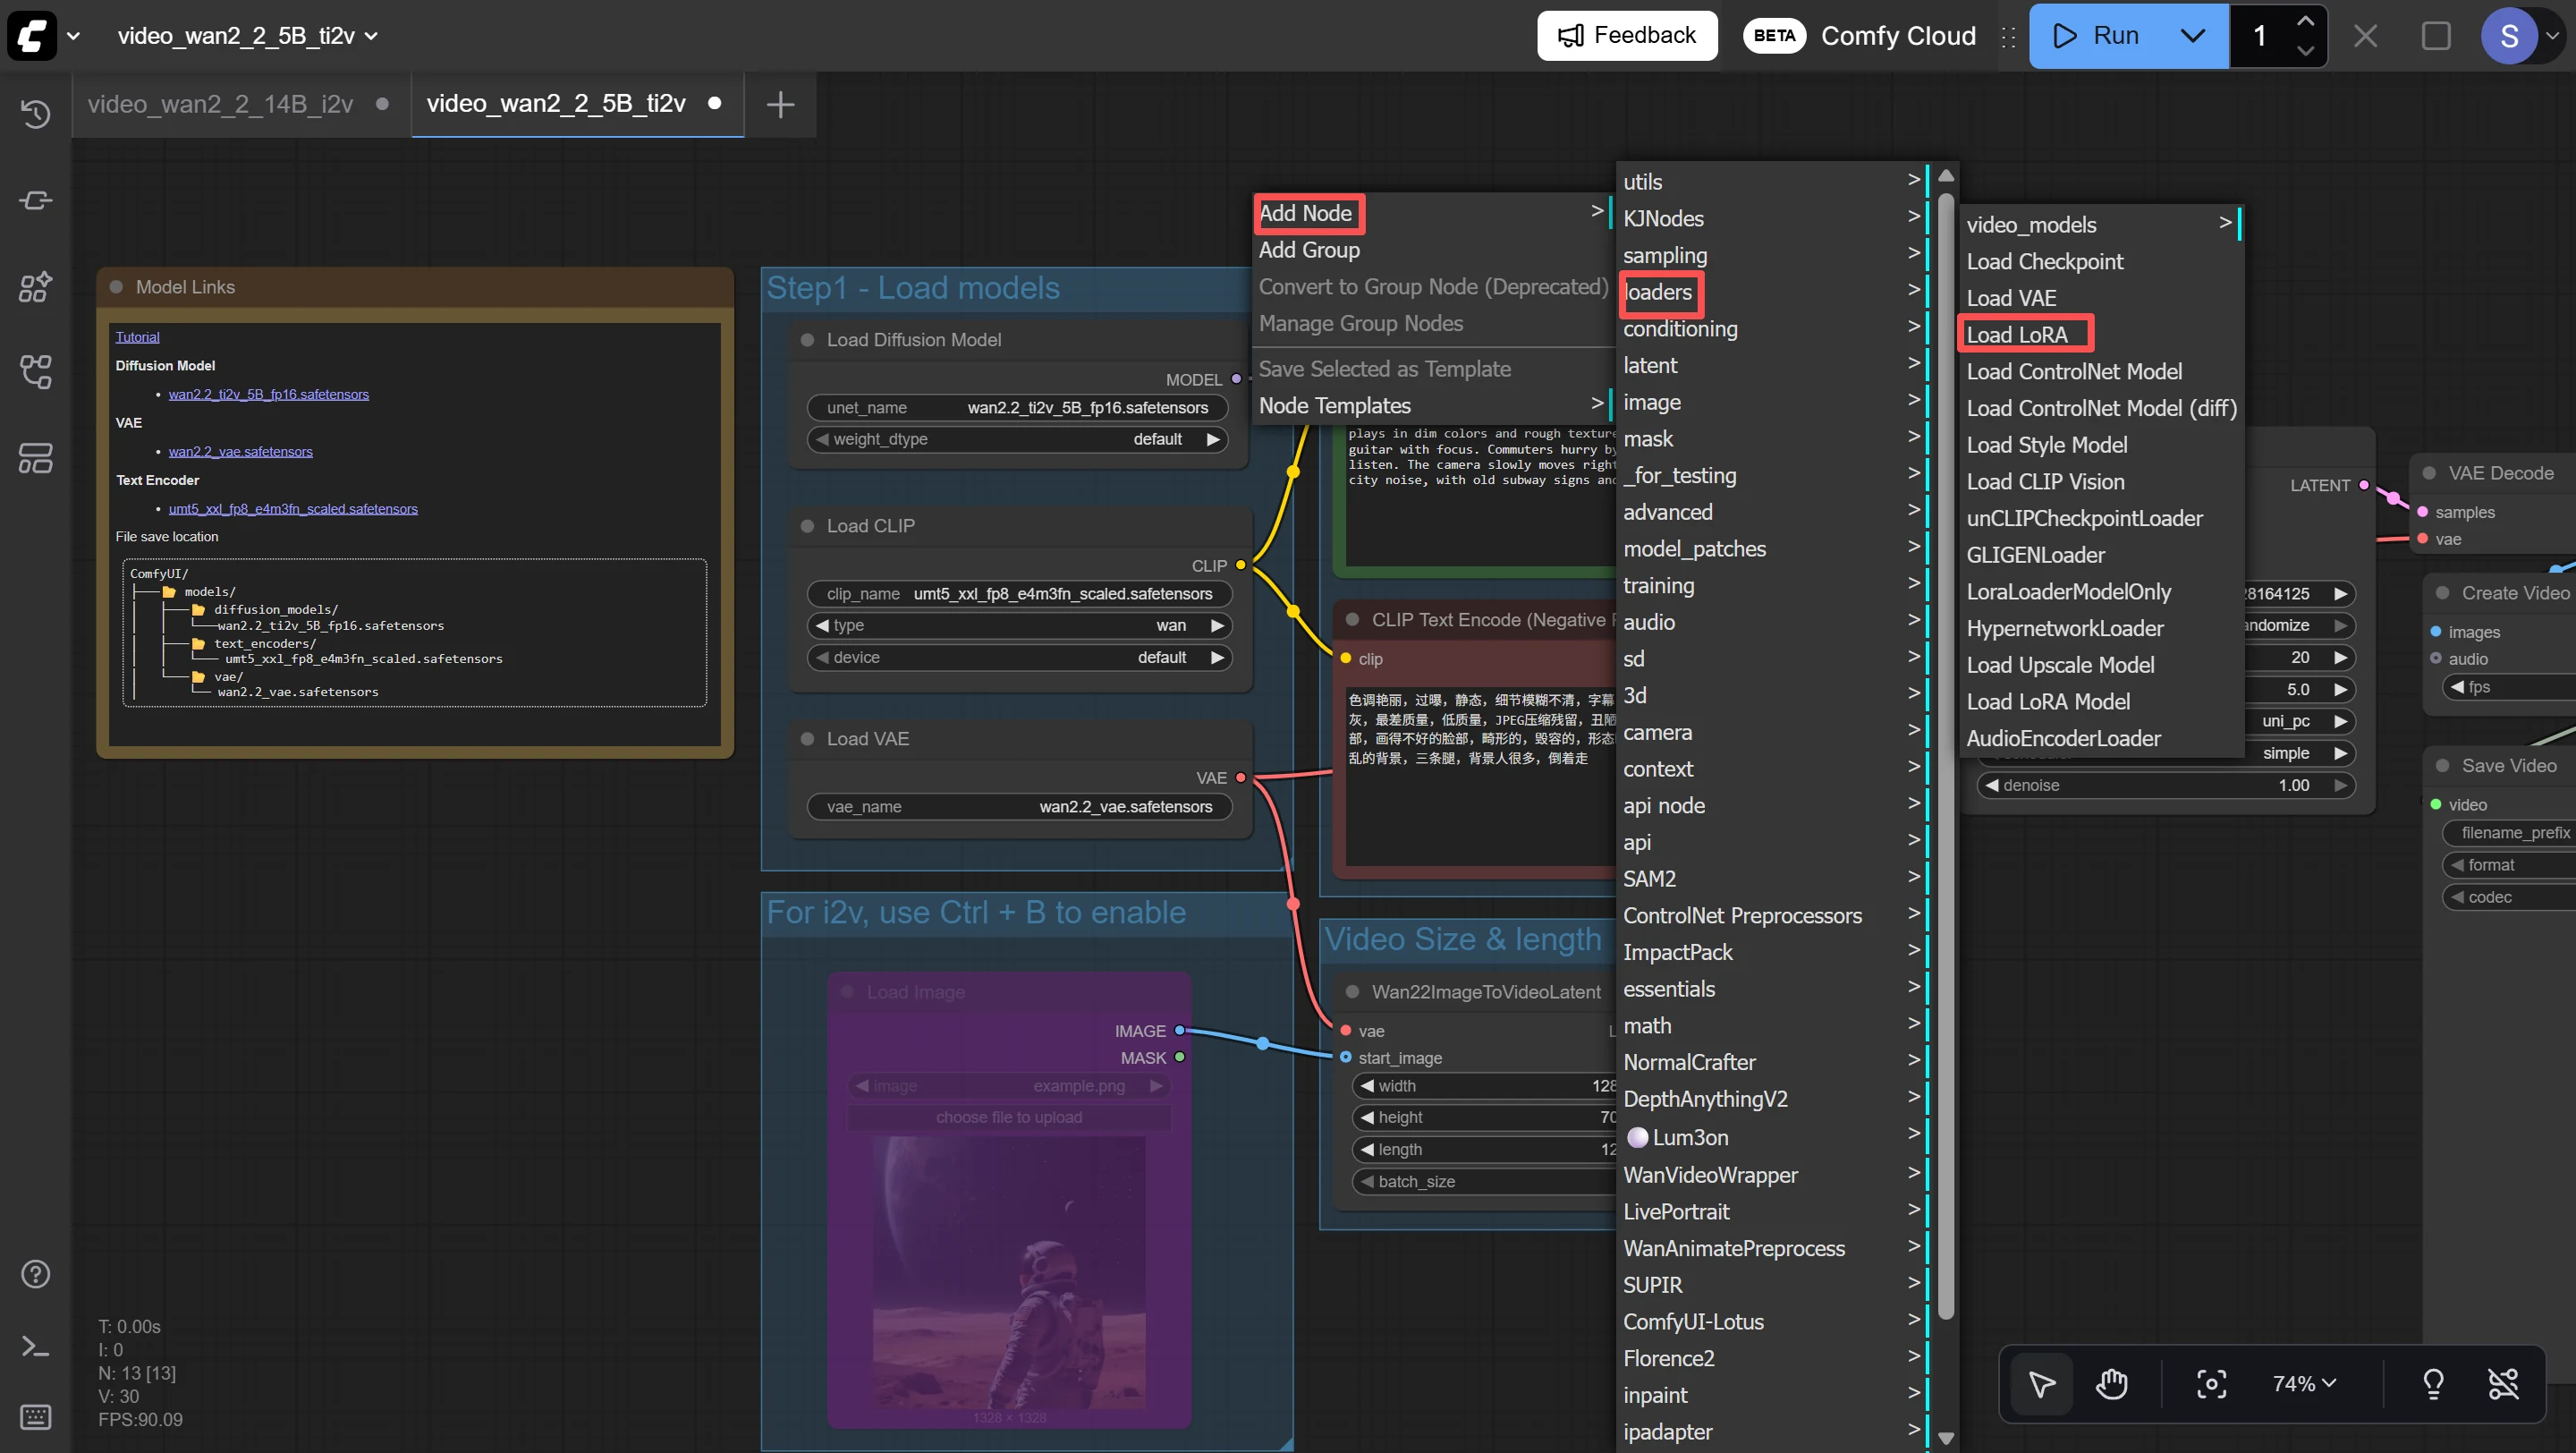
2. Add the Load LoRA Node
In ComfyUI, right-click anywhere on the canvas → Add Node → loaders → Load LoRA. A new node will appear with three settings: lora_name, strength_model, and strength_clip.
3. Connect It to Your Workflow
The Load LoRA node goes between your Checkpoint Loader and the KSampler. Here's the chain: Load Checkpoint → Load LoRA → KSampler. Connect the MODEL output from Checkpoint to the Load LoRA's model input. Then connect Load LoRA's MODEL and CLIP outputs to wherever your Checkpoint previously connected (usually KSampler and your prompt nodes).
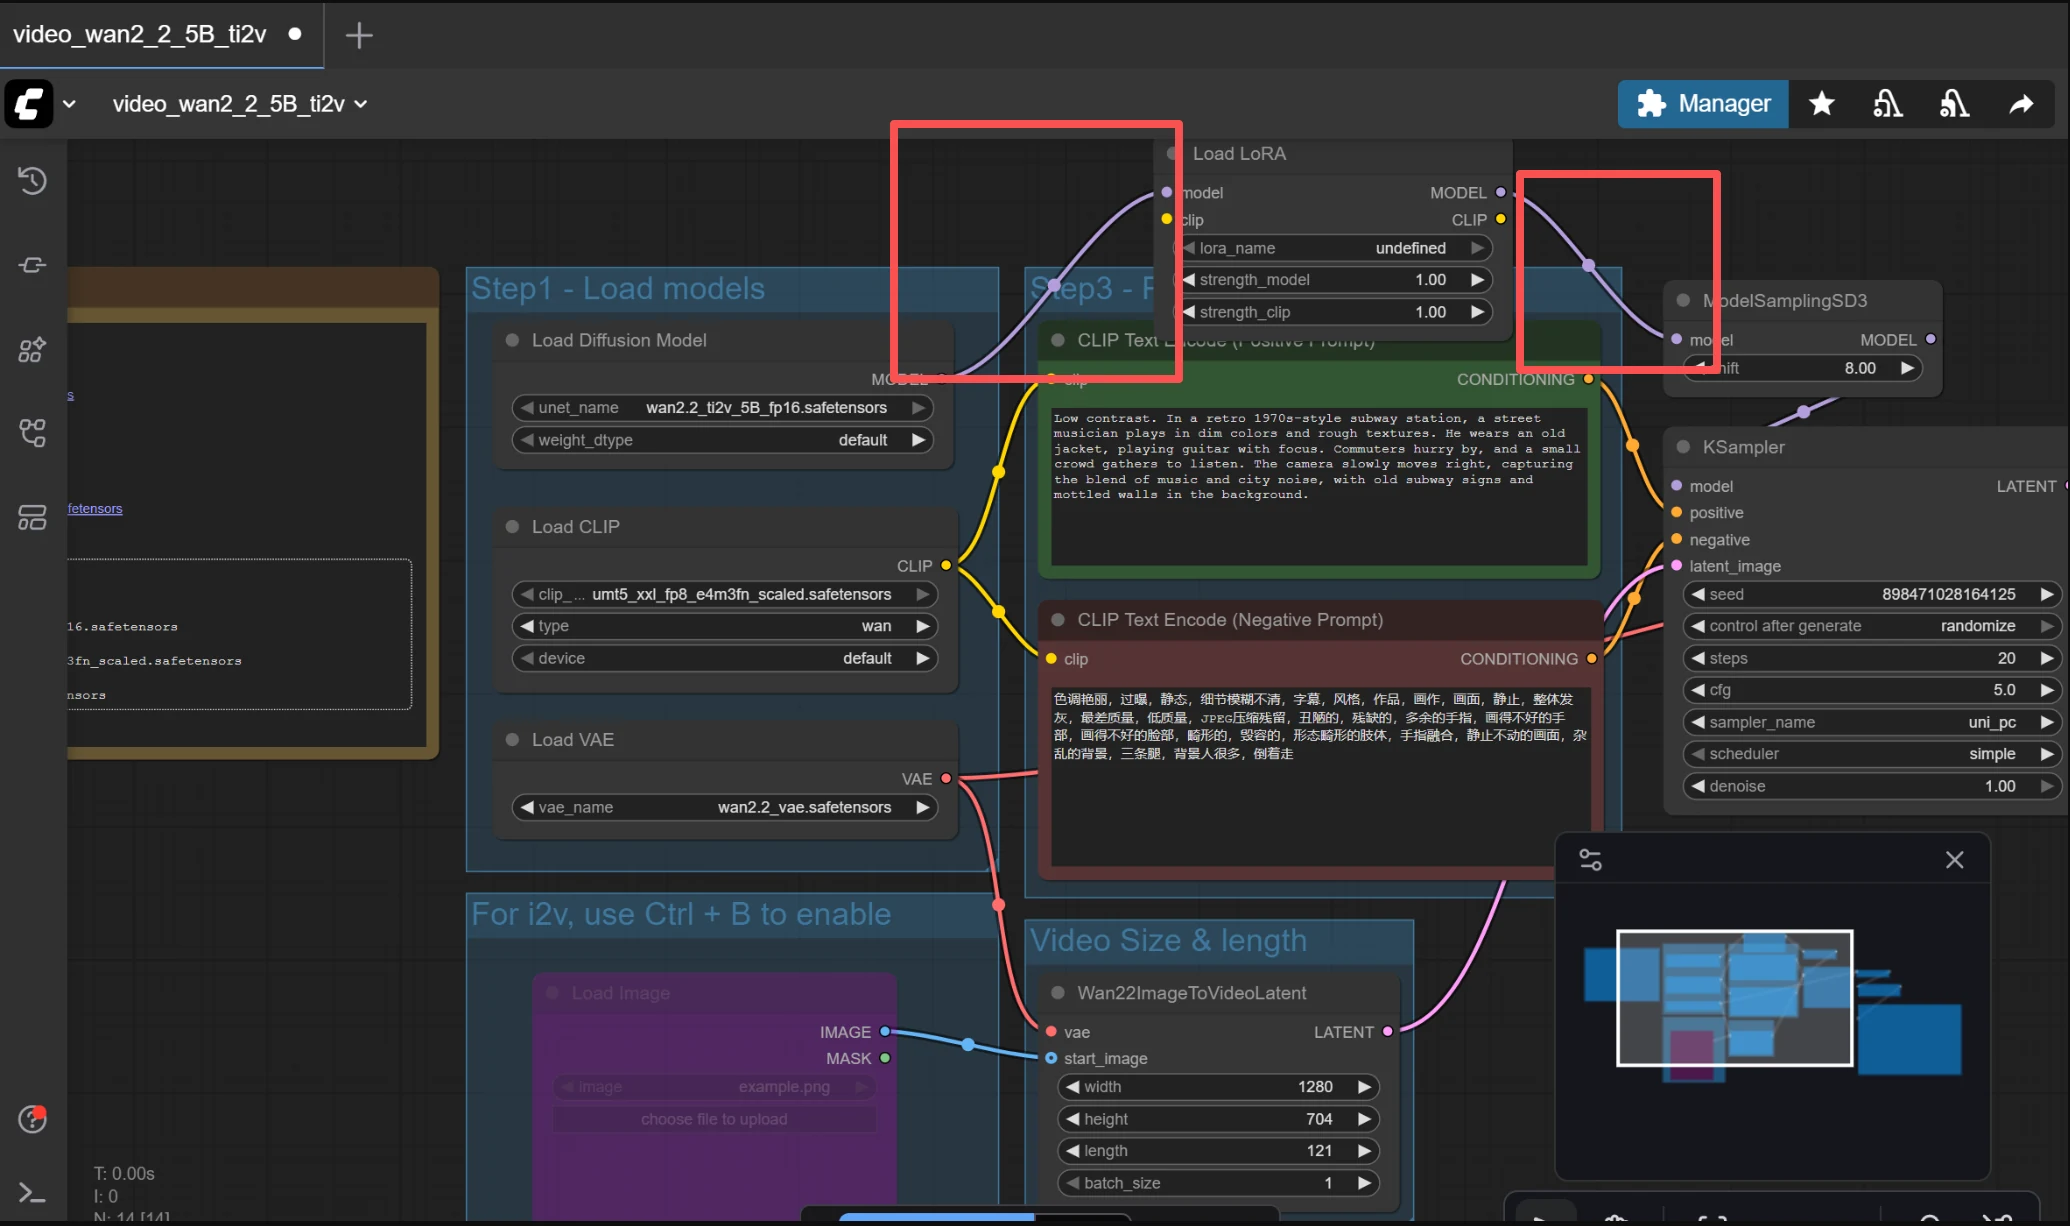
4. Configure the Settings
- lora_name: Click the dropdown and select your .safetensors file from the list
- strength_model: Start at 0.7. This controls how strongly the LoRA influences the generated image. Higher = more like your character but risk of artifacts. Lower = less resemblance but more natural-looking.
- strength_clip: Start at 0.7. This controls how much the LoRA influences the text prompt interpretation. Usually keep this the same as strength_model.
5. Use the Trigger Word
When you trained the LoRA, you likely set a "trigger word" — a keyword that activates the character (e.g., "ohwx woman" or "mychar"). Include this trigger word in your positive prompt along with your scene description. For example: "ohwx woman, standing on a balcony, sunset lighting, wearing white sundress".
Bonus: Stacking Multiple LoRAs
You can chain multiple Load LoRA nodes in sequence — for example, one for your character identity and another for a specific art style. Just connect them in series: Checkpoint → LoRA 1 → LoRA 2 → KSampler. Lower the strength of each (0.4-0.6) when stacking to avoid conflicts.
What it can do: Lock the entire character identity — face, hairstyle, body type, tattoos, signature accessories. This is the key difference from Method 1. Your character becomes a reusable asset that stays consistent across hundreds of generations.
What it can't do: Work instantly. You need 1-2 hours of preparation (creating datasets, training). Also, if your training images are inconsistent, the LoRA will learn those inconsistencies. Quality in = quality out.
Method 3: Controlled Video Generation
Best for Video QualityWhy Pure Text-to-Video Fails
If you type "a woman walking on the beach" into a text-to-video generator, the AI imagines a new woman every time. Even with a LoRA loaded, pure text-to-video gives the AI too much creative freedom — and freedom is the enemy of consistency. The key insight: consistency is a constraint problem, not a creativity problem.
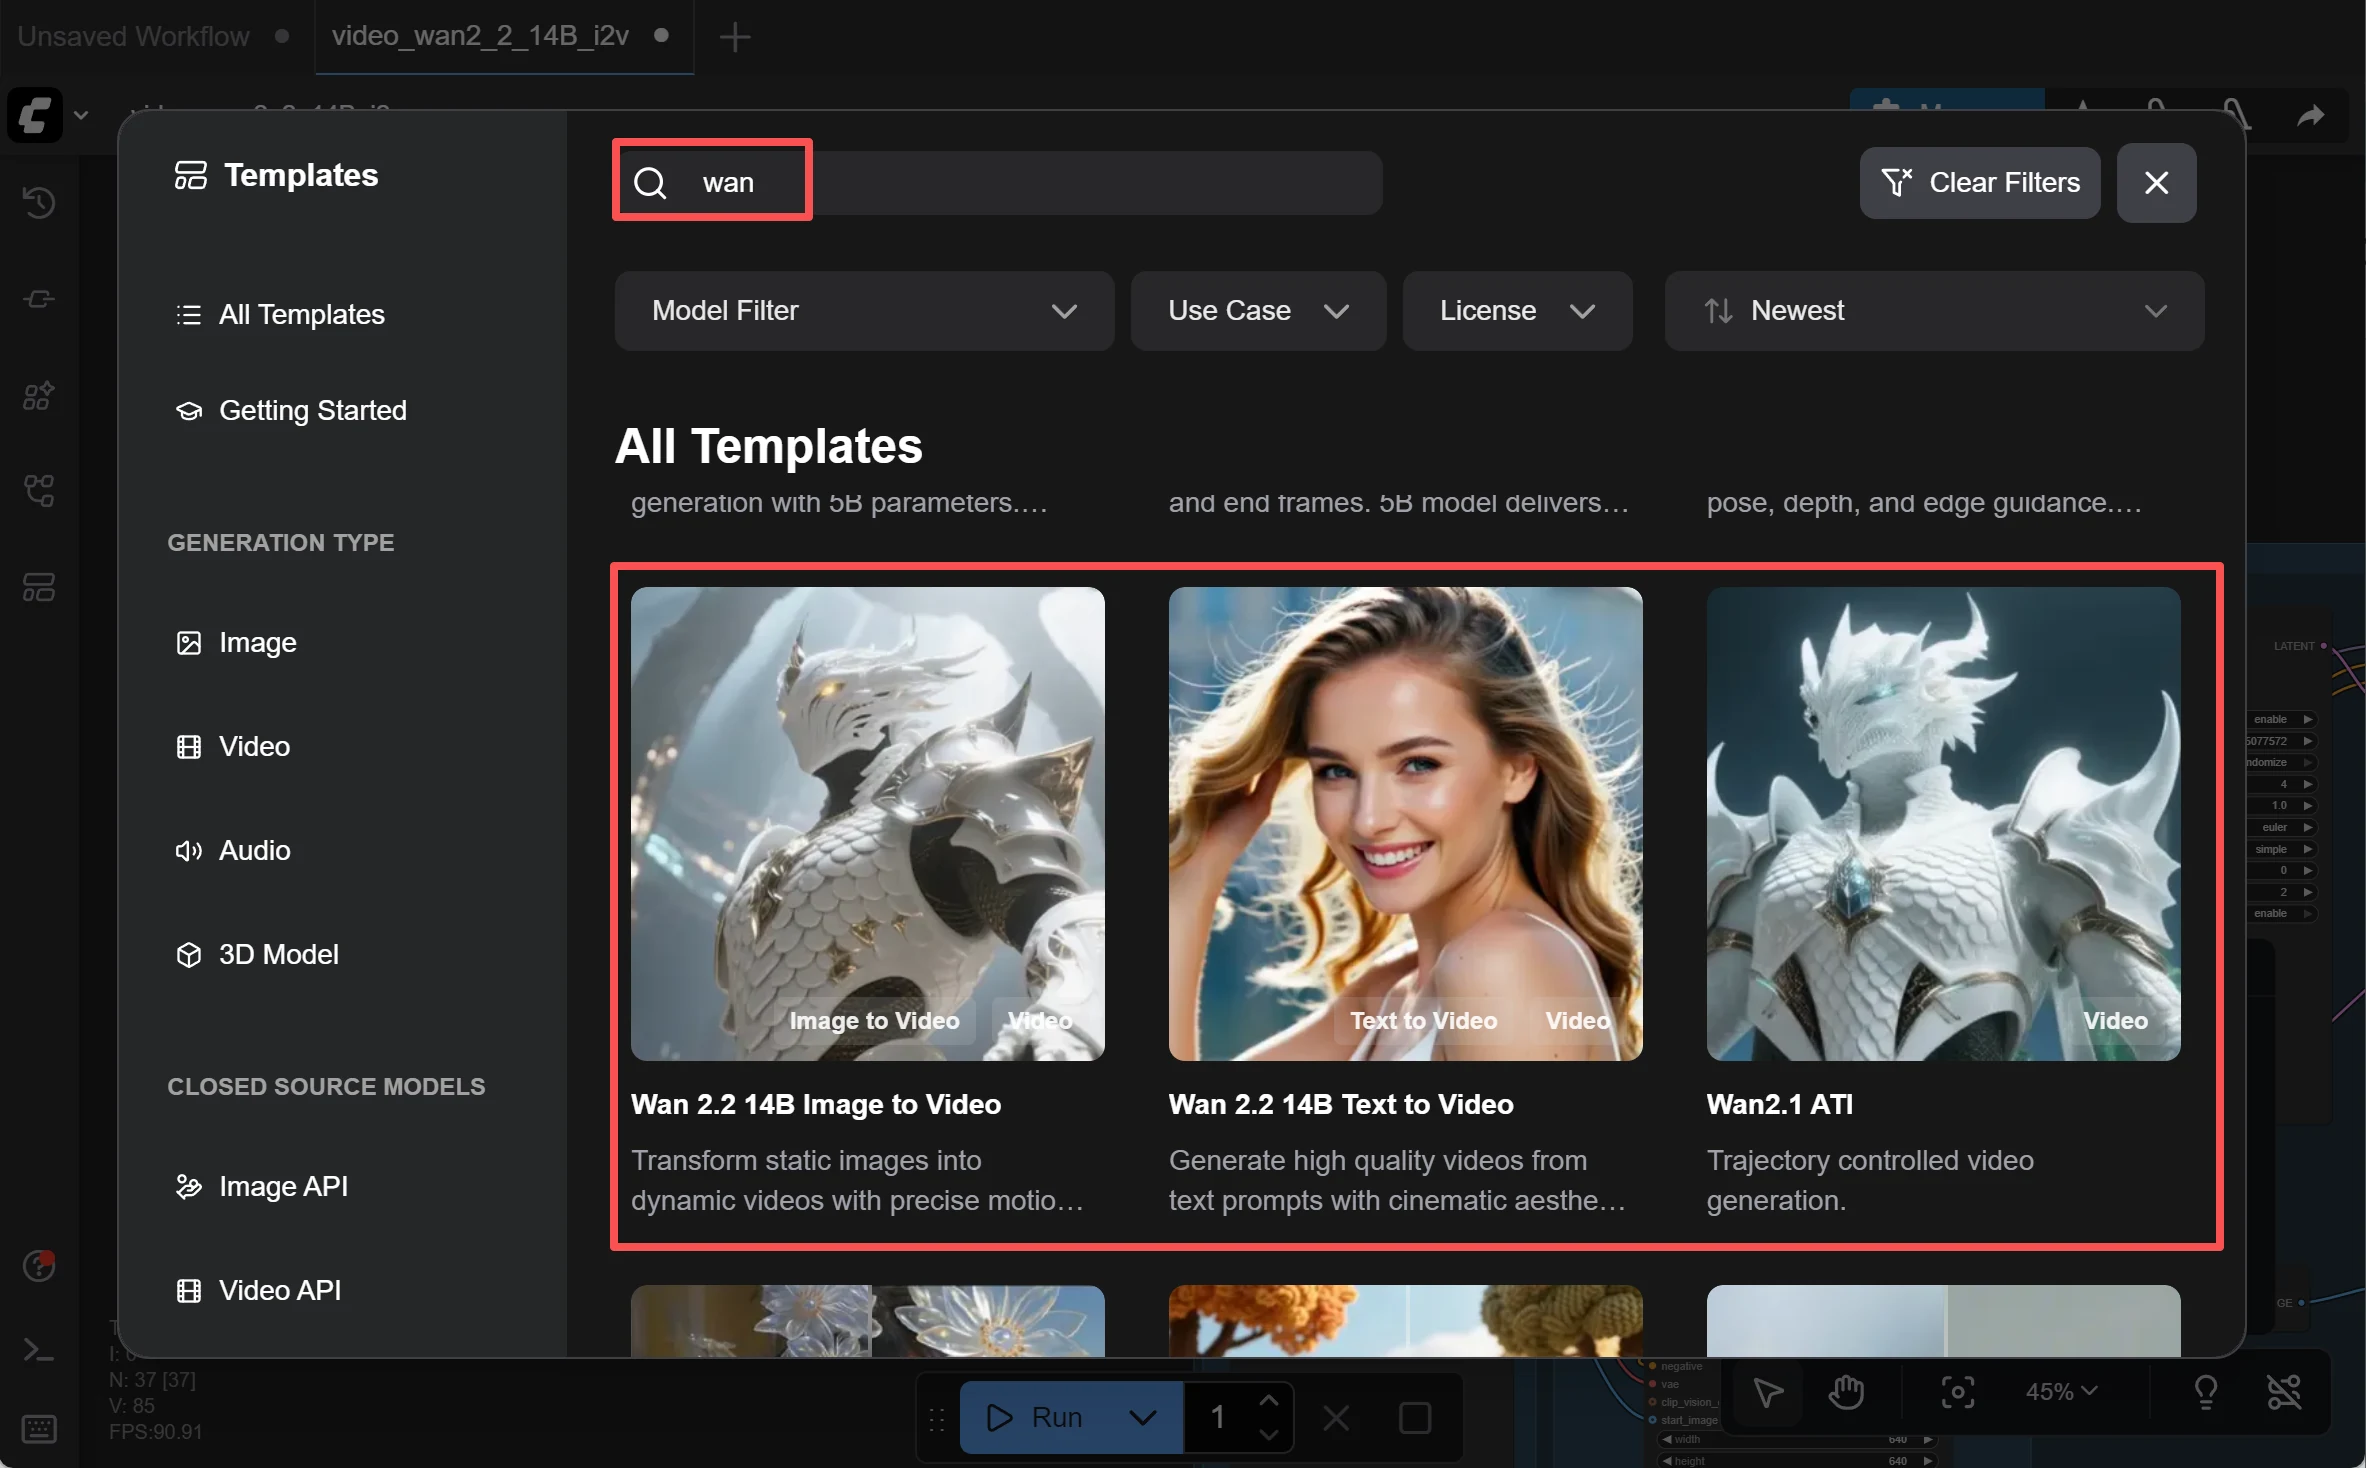
The Models: Wan 2.2 & Wan 2.1 VACE
The Wan series by Alibaba is the current gold standard for open-source AI video generation in ComfyUI. Two versions matter:
Wan 2.2 (Recommended)
Wan 2.2 is the latest open-source release (Apache 2.0 license). It uses a Mixture-of-Experts (MoE) architecture — 27 billion total parameters with 14 billion active per generation step. Compared to Wan 2.1, it was trained on 65% more images and 83% more video data, resulting in noticeably better motion coherence, aesthetics, and prompt understanding. It supports Text-to-Video, Image-to-Video, and runs natively in ComfyUI. The 5B variant (TI2V-5B) can generate 720p video on a single RTX 4090.
Because Wan 2.2 is open-source and runs locally on your own machine, it doesn't have the same cloud-side content moderation that commercial API services enforce. Your generations stay on your computer and are not filtered by a remote server. That said, always use AI-generated content responsibly and in compliance with your local laws.
Wan 2.1 VACE (Still Widely Used)
VACE stands for Video All-in-one Creation and Editing. This older model remains popular because many existing ComfyUI workflows and tutorials are built around it, and it has mature support for Reference-to-Video, Image-to-Video, and Control Video modes. If you find a tutorial or workflow online that uses "Wan VACE," it's almost certainly the 2.1 version. It's still a solid choice, especially if your GPU has less VRAM.
Reference-to-Video
You provide a character reference image, and the model uses it as a visual anchor throughout the video. The AI references this image to maintain consistent style, face, and details — even when the character moves or the camera angle changes. Think of it as pinning your character's photo to the AI's desk while it works.
Image-to-Video (I2V)
You start with a static image — perhaps one you generated with your character LoRA — and animate it. Since the character's appearance comes directly from the input image, consistency is naturally preserved. This is the most reliable path for short NSFW AI video clips.
Control Video
You provide a "skeleton video" — either a pose sequence or a real video showing the motion you want — and the model maps your character onto it. Imagine having a dance video and replacing the dancer with your AI character while keeping every move intact.
How to Use It
- Prepare a character image using Method 1 or 2
- Load the Wan 2.2 model in ComfyUI (14B MoE recommended for quality, 5B TI2V for RTX 4090 users). Or load Wan 2.1 VACE if your existing workflow is built around it.
- Choose your mode: Reference-to-Video if you have a motion reference, I2V if you just want to animate a still image
- Write a simple prompt describing the action + connect your reference image → Generate
Key Tips
- Match your reference image resolution to the video output resolution — mismatches cause quality drops
- Start with short clips (2-5 seconds) to verify character stability before going longer
- The 14B model requires 24GB+ VRAM. If you have less, use quantized versions (GGUF) that run on 8-12GB. The Wan 2.2 5B variant is optimized for consumer GPUs.
- If you're starting fresh, go with Wan 2.2. If you already have a working Wan 2.1 VACE pipeline with trained LoRAs, weigh the cost of retraining before migrating.
Method 4: Short Shot Stitching
Best for Longer VideosWhy You Can't Just Generate Long Videos
Current AI video models accumulate errors over time. The first few seconds look great, but each additional frame introduces tiny deviations — slightly different nose, shifted eye color, drifting hair. By 10+ seconds, these compound into visible identity drift. Think of it like photocopying a photocopy: each generation degrades the original.
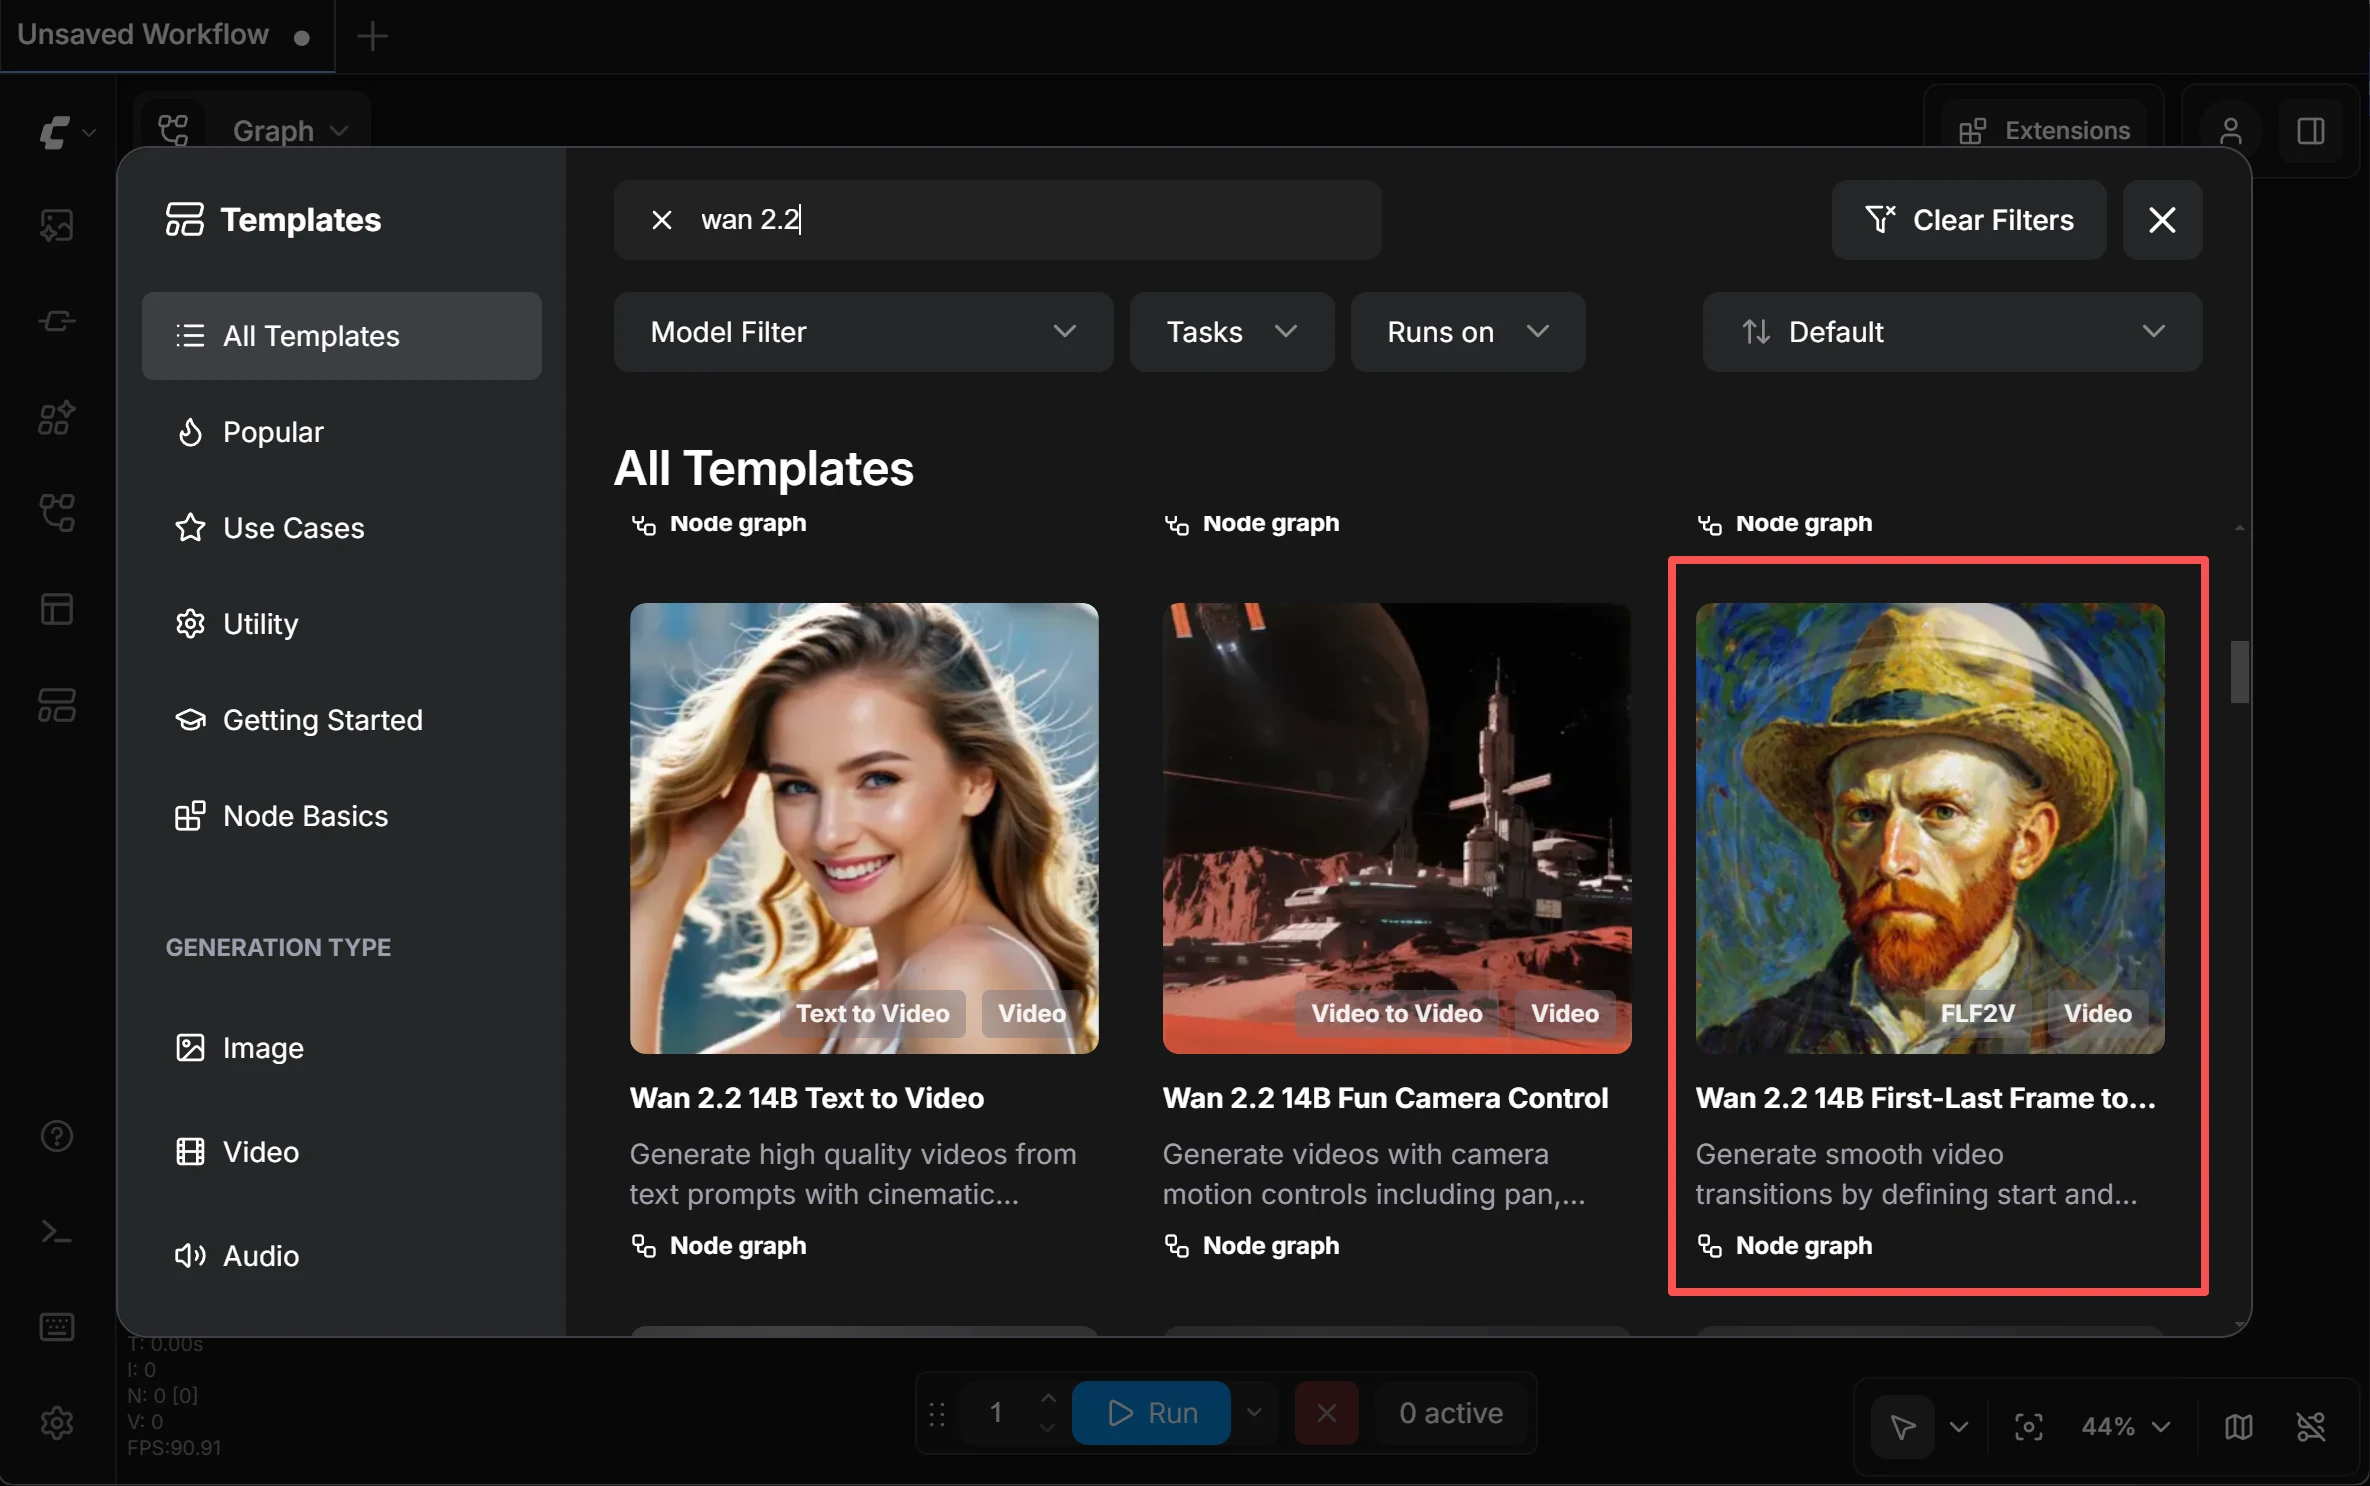
What is First-Last Frame (FLF)?
FLF is elegantly simple: you tell the AI "here's what frame 1 looks like, and here's what the final frame looks like — now fill in the motion between them." Because both endpoints are locked, the AI has far less room to drift. It's like connecting two dots with a smooth line instead of drawing freehand.
The Workflow
- Generate keyframes: Use your character LoRA + an image model to create the start and end images for each shot. Plan your "storyboard" — what's happening in each 2-5 second segment.
- Generate each short clip: Feed each start/end frame pair into LTX 2.3 or Wan 2.2's FLF mode. Each clip will have smooth, consistent motion between the two frames.
- Stitch clips together: Use any video editor (even free ones like DaVinci Resolve) to join your clips. Add transitions between segments to smooth the connections.
- Touch up if needed: If any individual clip has minor face drift, apply Method 5 (face swap repair) to fix specific frames.
Why This Is the Community Standard
This method isn't elegant, but it's the most reliable way to create longer NSFW AI video content with consistent characters. The community has converged on this approach because it works: short clips minimize drift, FLF locks the endpoints, and stitching gives you full control over pacing and flow. Many creators routinely produce 30-60 second videos this way by chaining 8-15 short shots.
Method 5: Face Swap Repair
Last-Mile FixWhat is ReActor?
ReActor is a face-swapping node for ComfyUI. It scans each frame of your video, detects faces, and replaces them with a target face you specify. It also includes built-in face restoration (CodeFormer) that automatically enhances facial details and fixes distortions after swapping.
Its Role in the Workflow
ReActor is not a primary production tool — it's a repair tool. Use it when you've generated an NSFW AI video using Methods 2-4 and the result is 90% good, but a few frames have minor face drift. ReActor patches those frames by re-applying the correct face identity.
What it can do: Correct minor facial identity drift. Fix frames where the nose shifted slightly, the eye color changed, or the skin tone drifted. The built-in CodeFormer restoration also sharpens facial details.
What it can't do: Fix full-body changes. If the body type, clothing, hairstyle, or tattoos shifted, face swap won't help — it only operates on the face region. It also struggles with extreme side profiles, fast motion, and heavy hair occlusion.
How to Use It
- Load the ReActor node in ComfyUI
- Input: your generated video + a clear reference face image of the character
- ReActor processes frame-by-frame, replacing faces + running CodeFormer restoration
- Output: the repaired video with consistent face identity
The Complete 4-Layer Workflow
Here's how all five methods fit together into a production-ready pipeline for creating NSFW AI video with consistent characters:
Character Build
InstantID / PuLID
Go from one image to a full character sheet. Solves: "I only have one reference photo."
Character Lock
LoRA Training
Train a reusable character identity. Solves: "I need this character across many videos."
Video Generation
Wan 2.2 / VACE / FLF
Generate short, consistent video clips. Solves: "The character drifts during video."
Repair
ReActor / CodeFormer
Fix any remaining face drift. Solves: "A few frames are slightly off."
You Don't Need All Four Layers
If you just want a few consistent images → Layer 1 is enough. For short NSFW AI video clips → Layers 1 + 3. For serialized content with a recurring character → all four layers. Match the complexity to your needs.
Or... Skip the Complexity Entirely
The workflow above is powerful — but let's be honest, it requires ComfyUI, model downloads, GPU hardware, LoRA training, and video editing. That's a lot of moving parts. If you want to create NSFW AI video content without becoming a workflow engineer, there's a simpler path.
deep-fake.ai: One Platform, Zero Setup
deep-fake.ai was built specifically for creators who want results without the technical overhead. Instead of juggling five separate tools, you get everything in one unified workflow:
Unified Creative Suite
AI image generation, face swapping, and video creation — all in one platform. No tool-switching, no format converting, no workflow debugging. Go from idea to finished NSFW AI video in minutes.
Truly Unrestricted
No content filters, no moderation roulette, no "image is moderated" errors. deep-fake.ai was designed for adult content from day one. What you prompt is what you get.
No Hardware Required
Everything runs in the cloud. No NVIDIA GPU, no VRAM calculations, no model downloads. Works on any device with a browser — including your phone.
Privacy by Design
All uploaded content is automatically deleted within one hour. Zero logs, zero tracking. You don't even need to create an account to try it.
Frequently Asked Questions
Ready to Create Consistent NSFW AI Videos?
Whether you choose the full ComfyUI workflow or the easy path with deep-fake.ai, consistent characters are now within reach. Start creating today.
Get Started Free